How to Buy and Store NFTs with MetaMask
A complete walkthrough of the MetaMask wallet, buying or receiving ETH & buying and storing Non-Fungible Tokens.
Rollbit
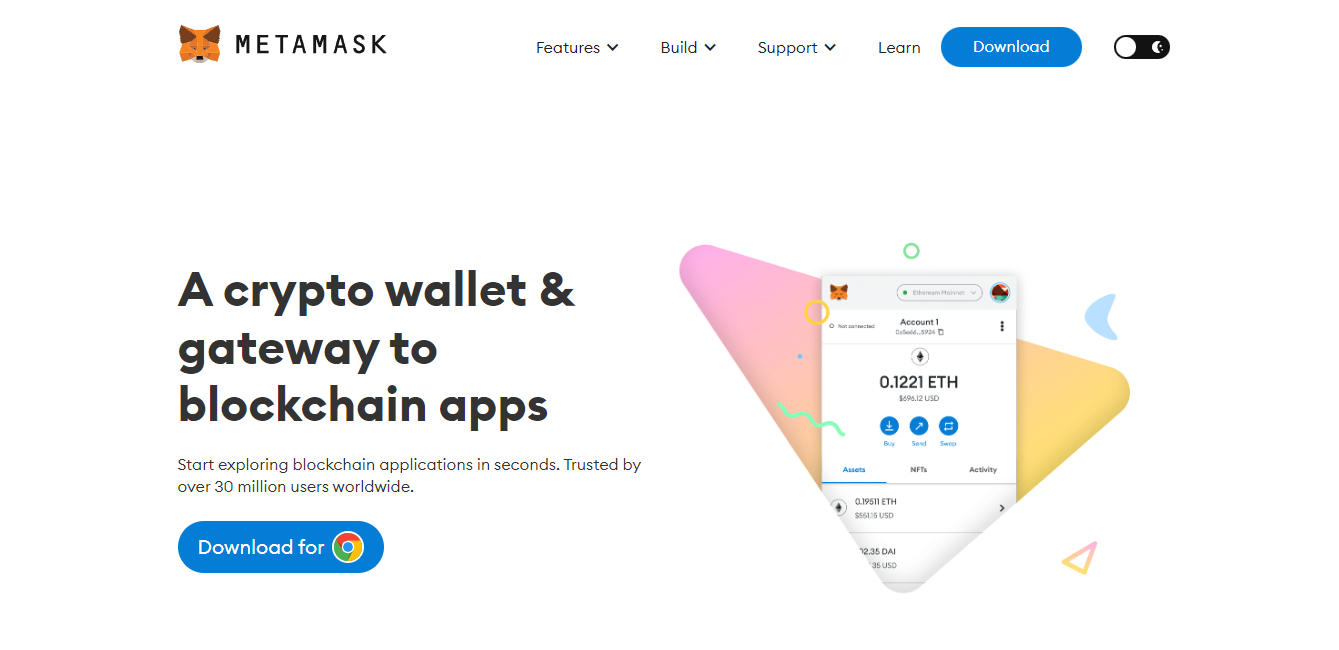
Created by Consensys and launched in September 2016, MetaMask is considered to be the best wallet for interacting with decentralised applications and the most popular wallet for buying and storing NFTs.
As a web 3.0 wallet, MetaMask allows you to authorise your Ethereum account by interacting with NFT marketplaces such as OpenSea, Rarible and SuperRare to buy, sell and trade these tokens.
In this guide, we’ll provide a complete walkthrough of getting MetaMask, buying or receiving ETH using the browser-based wallet as well as buying and storing Non-Fungible Tokens.
Downloading MetaMask
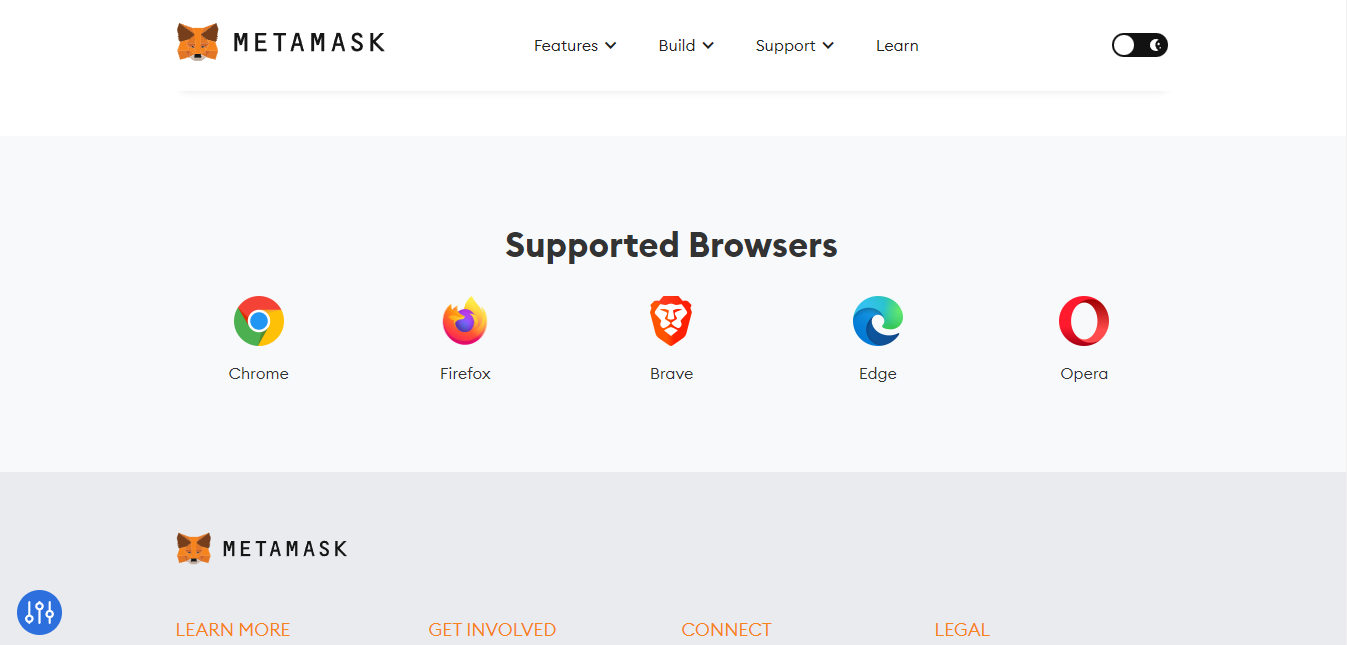
You can download MetaMask on several browsers (such as Brave, Google Chrome, Edge and Firefox) as well as Android or iOS mobile devices from the wallet’s website. Click on ‘Install MetaMask’.
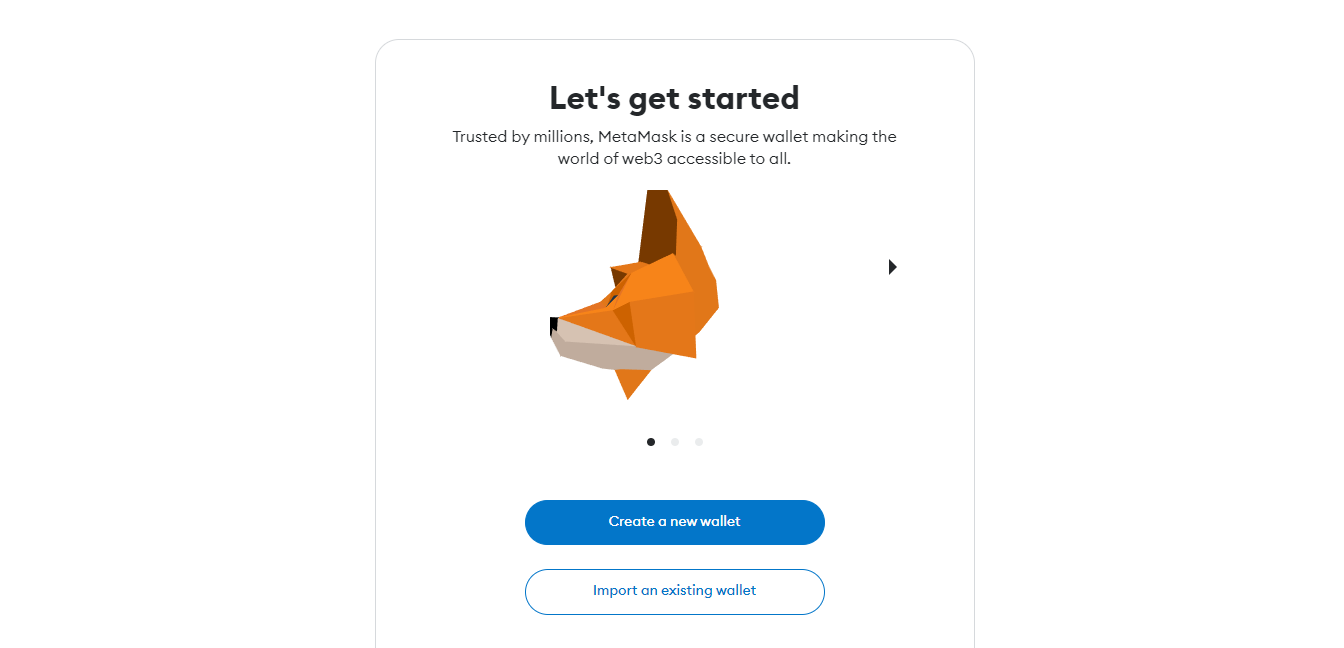
A new tab will open and you’ll be able to add MetaMask to your browser. Once you’ve added MetaMask, you’ll see a fox icon in the toolbar of your browser. Click on ‘Get Started‘ and choose from two options: import a wallet or create a new wallet.
If you’ve used MetaMask before, you’ll already have a secret recovery phrase, which can restore your wallet on any device by importing the seed phrase. Otherwise, you can create a new wallet, after which you can agree or decline the request for user data.
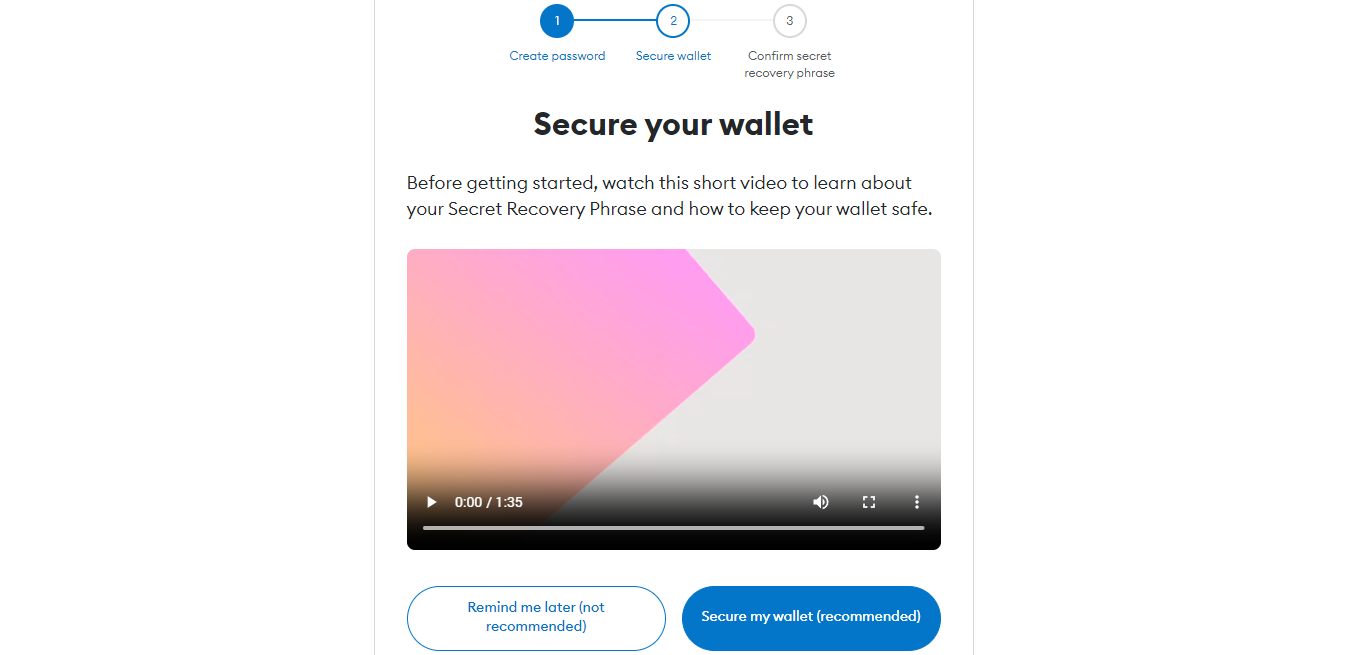
Then you’ll have to create a password and agree to the Terms of Use. The site then displays a short video about how to secure your wallet. Once you’ve watched the video, click on ‘Next’.
You’ll then get your secret backup phrase. It’s important to keep this safe and never share it with anyone, since this unique phrase can restore your account and be used to gain access to any funds stored in your Ethereum address via MetaMask.
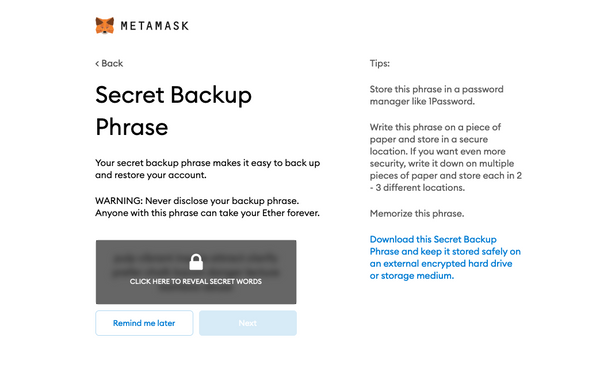
Reveal the secret words, make a note of them and keep it in a secure place. Once you’ve written your secret backup phrase, click on ‘Next’. You’ll then have to confirm your secret backup phrase by clicking on the words displayed in the blue boxes in the correct order.
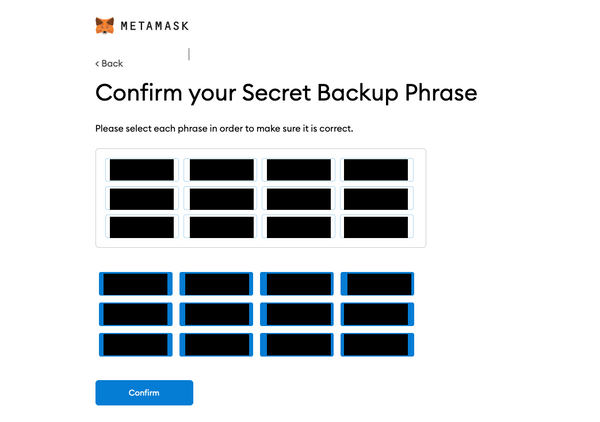
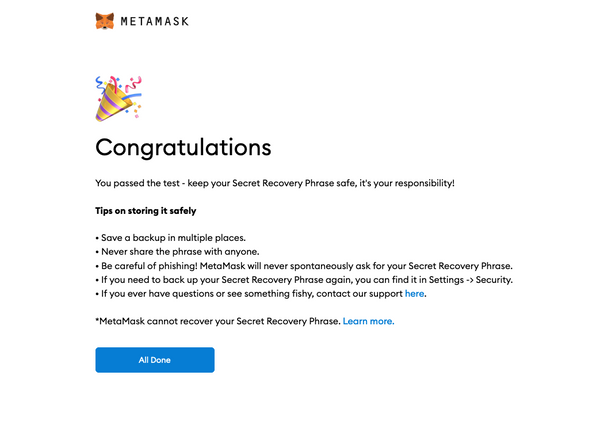
Once done, click on ‘Confirm’. You’ll then see some tips on storing your secret recovery phrase safely. Click on ‘All Done’.
From MetaMask’s menu, you can change the settings such as your preferred currency/language, add contacts, view your secret recovery phrase, manage the security/privacy settings and add other networks that are compatible with the Ethereum Virtual Machine (such as Avalanche or Polygon). The menu also allows you to connect your MetaMask with hardware wallets such as Ledger or Trezor.
Funding Your MetaMask Wallet with ETH
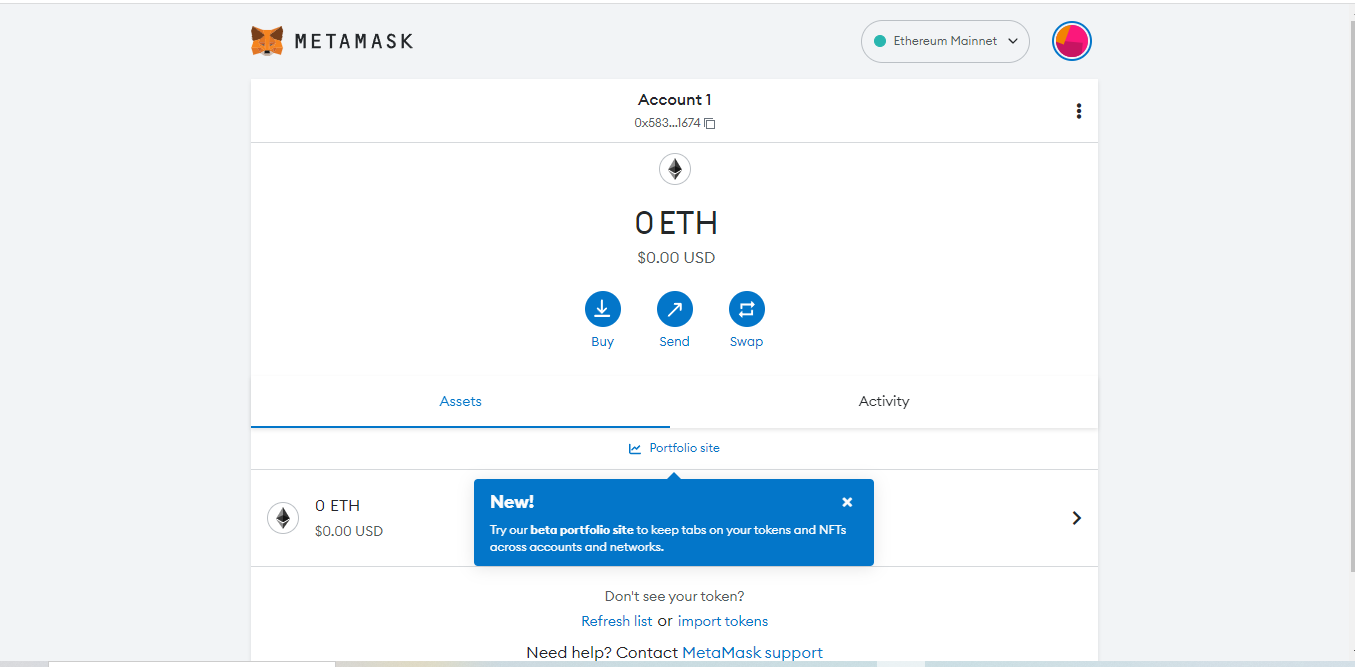
Now your MetaMask wallet is all setup, you’ll be able to buy or transfer ETH to your account. Click on ‘Buy’ to add ETH to yout wallet using a debit card via Wyre.
Once you click on ‘Continue to Wyre’, a new tab will open and you can input the amount of ETH you want to buy, select from Apple Pay or make a payment with your card. You’ll then have to enter your card information, billing address and contact details.
After entering your details, your order will be processed and you’ll receive a notification about your ETH purchase detailing how many coins you have bought. You can then close the window or track your transaction status.
If you already hold ETH, you can copy your account’s Ethereum address (shown below) and use it as the receiving address when transferring ETH:
Buying and Storing NFTs with MetaMask
Now you know how to add ETH to your MetaMask account, we’ll show you how to buy and store an NFT. In this example, we’ll purchase a cheap NFT from OpenSea to illustrate how MetaMask works.
Once you navigate to OpenSea or any other NFT marketplace, you’ll first have to connect your MetaMask wallet and authorise your Ethereum account. Go to ‘Connect’ on the top right-hand side of the site to link your MetaMask wallet.
You’ll then be able to buy an NFT from the marketplace, provided you have enough ETH. Go to the marketplace to see which NFTs are available to buy:
Once you’ve found an NFT you want to purchase, click on it. To illustrate, we’ll purchase an NPC NFT. Check the price and click on ‘Buy now‘. Check the box to confirm you’ve reviewed the information about the NFT you want to buy, then agree to the terms of service and go to ‘Checkout‘.
The MetaMask wallet will open and you’ll be asked to confirm the transaction details. To purchase an NFT, you’ll have to pay a gas fee which is shown in MetaMask, along with the total amount. You can adjust the gas fee as shown below. Click on ‘Confirm‘ to proceed with the purchase or click on ‘Reject‘ if the gas fee is too high and you want to try again when Ethereum fees are lower.
You’ll then have to wait some time for the transaction to be processed on the blockchain.
Once confirmed, you can retrieve the NFT’s contract address from EtherScan and add the token to MetaMask to view your NFT within the wallet (as illustrated by the video above). Your NFT is now stored in your Ethereum address and accessible via MetaMask!
If you found this guide useful, please share it with others on social media! Have any other questions about MetaMask or NFTs? Let us know via Discord on or Twitter!
-The Rollbit Team
Sign up for more like this.
RLB Utility Guide: Everything you need to know
In this article, we will get into all of the utility provided by RLB, from the buy and burn down to RLB rakeback!
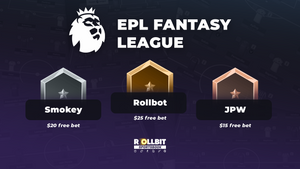
EPL Fantasy League
Take part in the Rollbit Fantasy Premier League for the chance to win free sports bets through the season!
1,000x Leverage Crypto Futures ��
The popularity of cryptocurrency trading on Rollbit has exploded in the past few months. Find out how to trade with up to 1000x leverage on Rollbit! How to get started: To get started, simply go to the Crypto Futures page on Rollbit! In addition to the direct link, users can
Как добавить Fantom в MetaMask — пошаговое руководство
Технология блокчейн в корне изменила то, как мы взаимодействуем с цифровыми активами и децентрализованными приложениями. MetaMask — это популярное расширение для браузера, которое позволяет управлять цифровыми активами и взаимодействовать с децентрализованными приложениями (англ. dApps) Ethereum. Число блокчейн-платформ и dApps стремительно растет, поэтому особенно важным становится такой кошелек, который поддерживал бы все новые экосистемы и не отставал от развития криптовалютного сектора.
Fantom — это быстрая и масштабируемая блокчейн-платформа, которая поддерживает разработку децентрализованных приложений. Благодаря интеграции Fantom с MetaMask, пользователи могут взаимодействовать и совершать транзакции с dApps Fantom прямо из кошелька MetaMask. В этом пошаговом руководстве мы расскажем, как добавить Fantom в MetaMask и пользоваться преимуществами одновременно обеих платформ.
MetaMask и его место в криптовалютном секторе
MetaMask — это популярное расширение для браузера, которое позволяет пользователям взаимодействовать с децентрализованными приложениями (dApps) блокчейна Ethereum. Кошелек может похвастаться безопасным и простым в использовании интерфейсом для управления цифровыми активами на базе Ethereum, позволяя пользователям отправлять и получать Ether (ETH) и другие токены ERC-20.
MetaMask — это важный криптовалютный инструмент, облегчающий взаимодействие с dApps и доступ к различным децентрализованным сервисам. Он устраняет необходимость создавать полноценную ноду или отдельный кошелек для каждого используемого dApp. Вместо этого управлять цифровыми активами и взаимодействовать с dApps можно прямо из браузера.
Кроме того, MetaMask поддерживает разработку новых dApps в сети Ethereum. Он предоставляет разработчикам удобную платформу для создания и тестирования новых приложений, к которым пользователи могут легко получить доступ через удобный интерфейс MetaMask.
Еще одним важным аспектом MetaMask является поддержка приложений децентрализованных финансов (англ. DeFi). DeFi — это быстрорастущая сфера, в которой функционирует целый ряд децентрализованных платформ кредитования и торговли. MetaMask обеспечивает полный доступ к этим платформам, так что любой желающий может воспользоваться всеми преимуществами экосистемы DeFi.
Важность интеграции Fantom с MetaMask
Интеграция с MetaMask важна по нескольким причинам. Во-первых, она предоставляет пользователям доступ к растущей экосистеме dApps блокчейна Fantom. В последнее время сеть Fantom стремительно развивается, регулярно запуская новые проекты и приложения. Интеграция с MetaMask обеспечивает пользователям полный доступ к этим приложениям без необходимости создания отдельного кошелька.
Во-вторых, интеграция Fantom с MetaMask обеспечивает пользователям большую гибкость в управлении цифровыми активами. MetaMask — это популярный кошелек, который широко используется в экосистеме Ethereum. После интеграции Fantom в MetaMask пользователи смогут управлять своими активами на базе Ethereum и Fantom из одного кошелька, что значительно упростит взаимодействие с их различными криптовалютами.
Наконец, интеграция Fantom с MetaMask снижает комиссии и задержки транзакций. Сеть Fantom создана таким образом, чтобы быть значительно быстрее и эффективнее своих конкурентов, что позволяет проводить транзакции быстро и с меньшими затратами. Интеграция Fantom и MetaMask откроет пользователям все эти преимущества и сделает взаимодействие с dApps Fantom более простым и выгодным.
Пошаговое руководство по добавлению Fantom в MetaMask
1. Установка и настройка MetaMask:
Загрузите и установите расширение MetaMask в вашем браузере. Вот как это сделать:
Перейдите на официальный сайт MetaMask и нажмите «Начать работу».
-
Выберите свой браузер и следуйте инструкциям по загрузке и установке расширения MetaMask.
- После установки откройте MetaMask и нажмите «Создать новый кошелек» или импортируйте существующий.
- Если вы создаете новый криптокошелек, следуйте инструкциям по установке пароля и резервной мнемонической фразы.
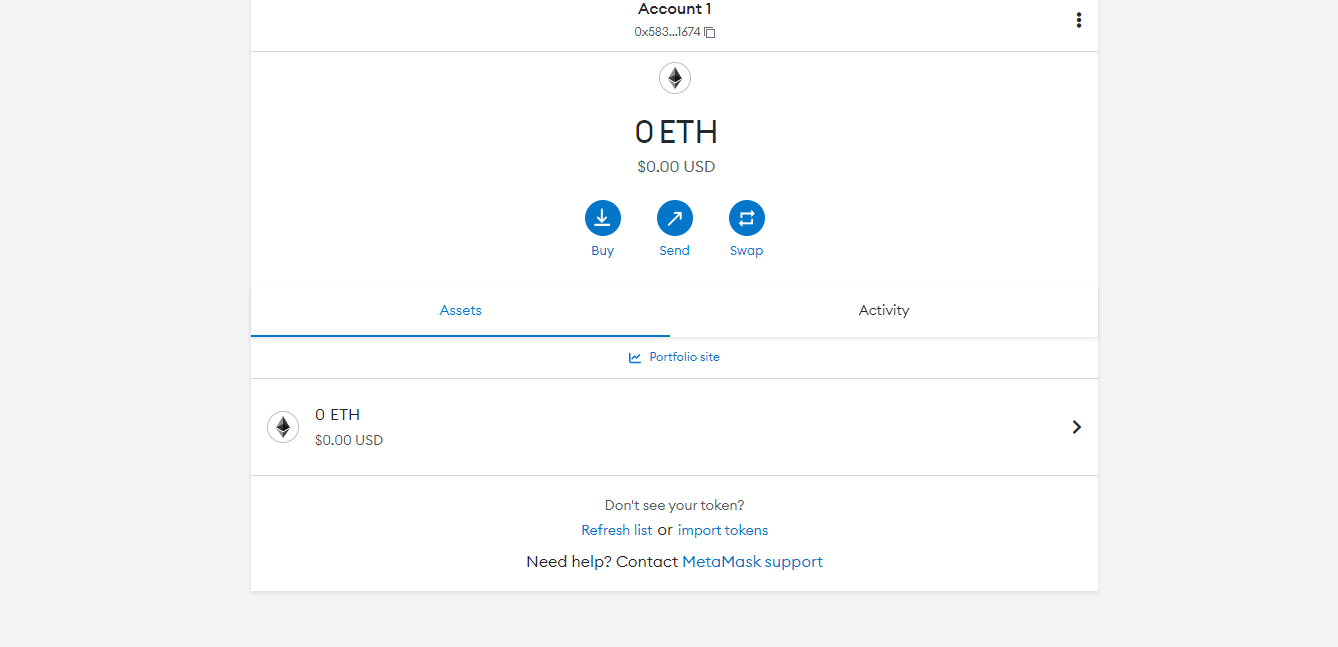
- После создания или импорта кошелька вам станет доступен интерфейс MetaMask.
Обзор интерфейса MetaMask:
Интерфейс MetaMask довольно прост. Вот краткий обзор его ключевых компонентов:
- Баланс: здесь отображается баланс вашего аккаунта в ETH или выбранном токене.
- Выпадающий список блокчейнов: позволяет переключаться между различными сетями Ethereum.
- Кнопки отправки и получения: позволяют отправлять или получать средства из вашего кошелька.
- История транзакций: здесь отображается история всех криптовалютных транзакций в выбранной сети.
- Настройки: позволяет получить доступ к настройкам и дополнительным функциям.
Мы установили и настроили MetaMask. Теперь интегрируем его с Fantom.
2. Добавление Fantom в MetaMask
Чтобы добавить сеть Fantom в MetaMask, нужно выполнить следующие шаги:
1. Откройте настройки сети в MetaMask:
- Нажмите на выпадающее меню «Сеть» в левом верхнем углу интерфейса MetaMask.
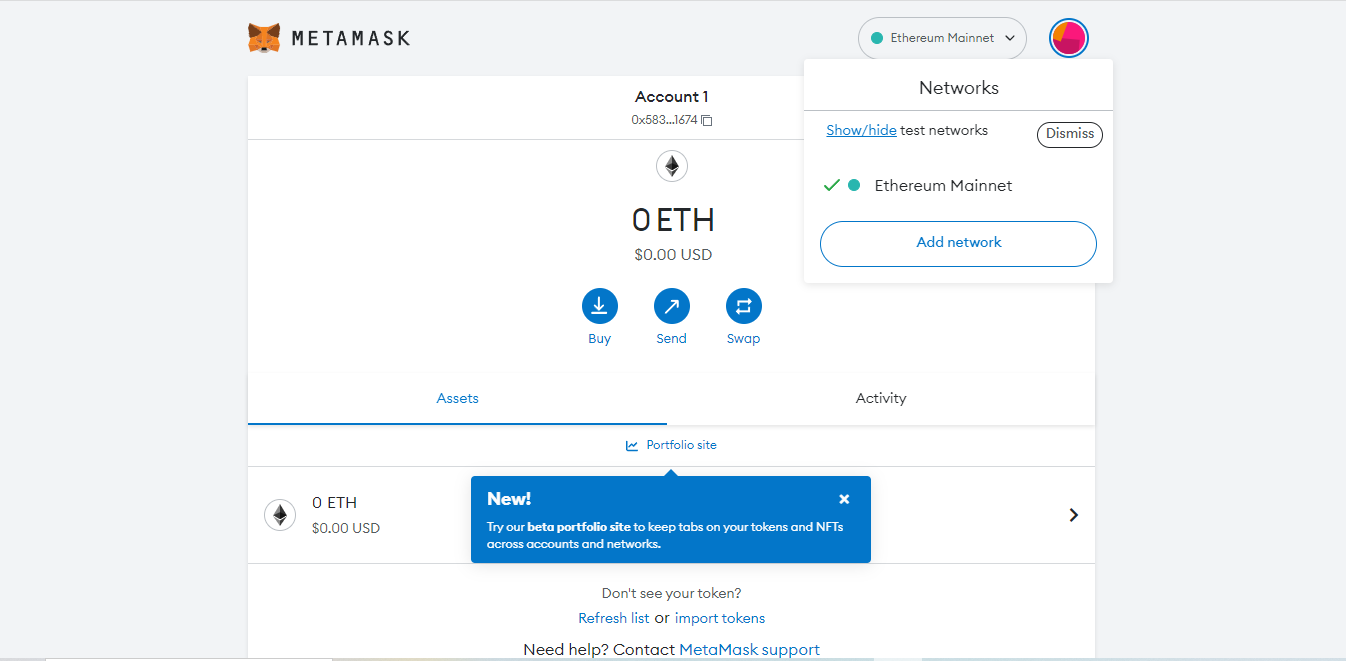
- Выберите опцию «Ethereum Mainnet».
2. Добавление сети Fantom
- Нажмите на выпадающее меню «Сеть» и выберите опцию «Fantom Opera».
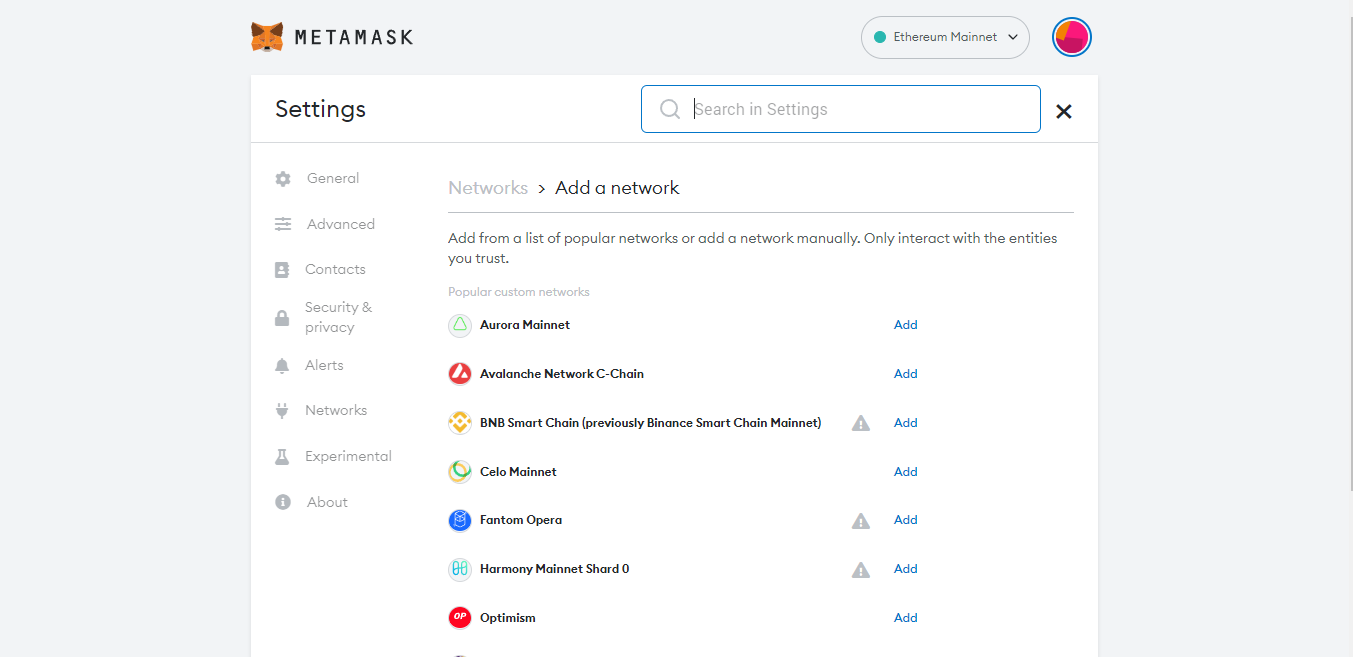
- Откроется окно, где будут указаны следующие данные:
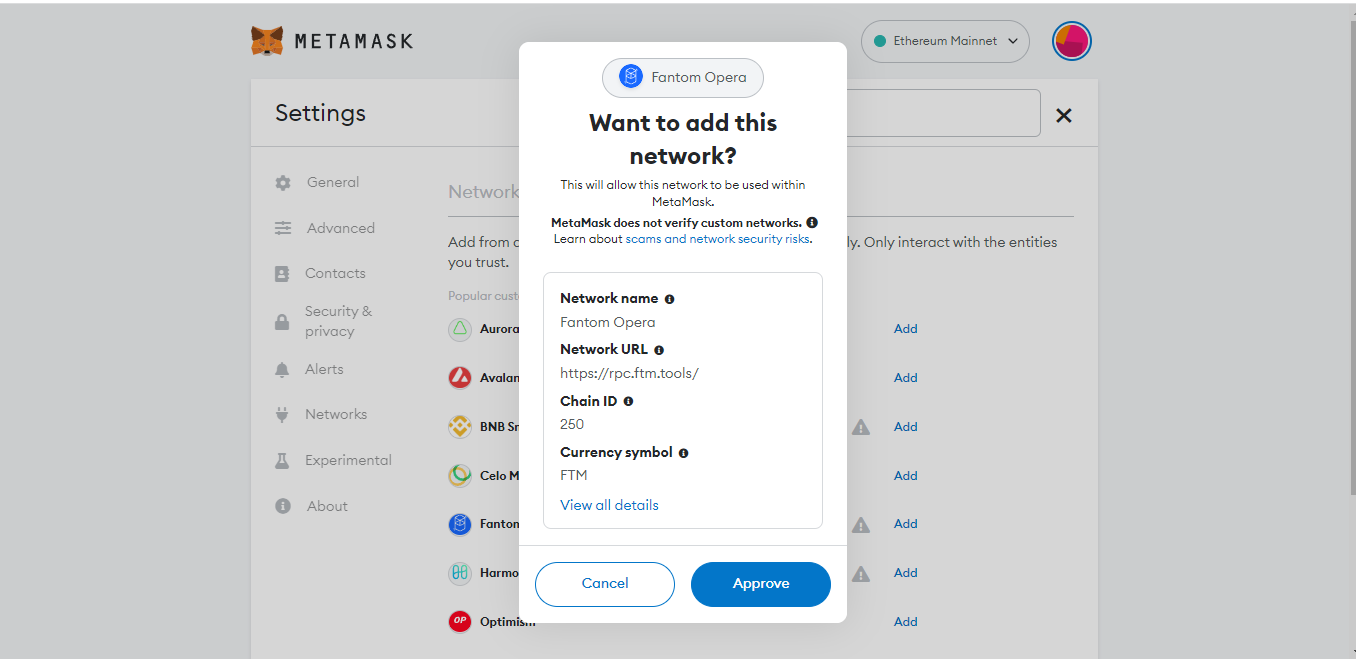
- Проверьте настройки и нажмите «Подтвердить», чтобы добавить сеть в MetaMask.
Когда вы выполните эти шаги, сеть Fantom появится в выпадающем списке сетей. Переключитесь на сеть Fantom и наслаждайтесь быстрыми и дешевыми криптовалютными транзакциями.
3. Добавление токенов Fantom в MetaMask
Чтобы добавить токены Fantom в кошелек MetaMask, выполните следующие шаги:
1. Добавление пользовательских токенов в MetaMask:
- Нажмите на иконку MetaMask, чтобы открыть интерфейс кошелька.
- Прокрутите страницу до самого низа и откройте меню «импортировать токены».
2. Установка адреса контракта и десятичного значения нужного токена:
- Откройте обозреватель блокчейна Fantom https://ftmscan.com/.
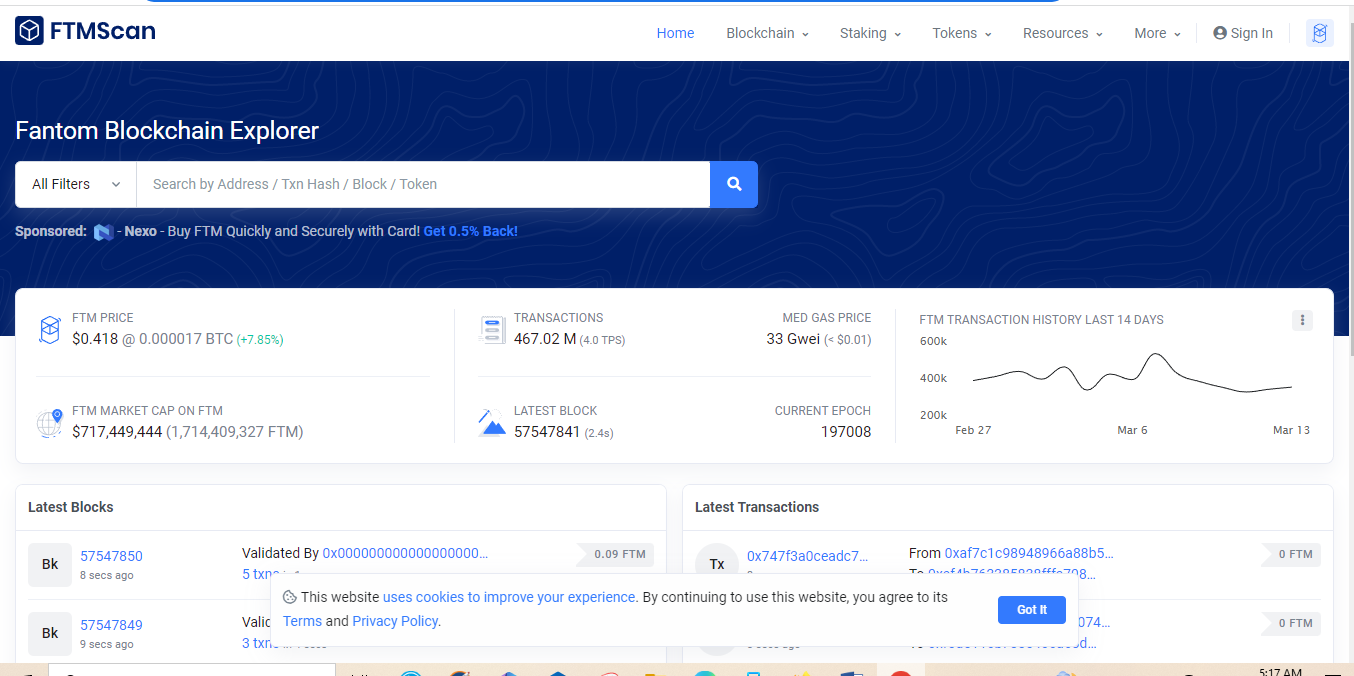
- Найдите токен, который вы хотите добавить в кошелек.
- Запишите адрес контракта и десятичное значение токена.
3. Добавление токена в MetaMask с правильным адресом контракта и десятичным значением:
- Откройте кошелек MetaMask и вставьте адрес контракта токена в поле «Token Contract Address».

- Введите тикер и десятичное значение токена в соответствующие поля.
- Нажмите «Далее».
- Нажмите «Добавить токены», чтобы завершить процесс.
После выполнения всех шагов токен появится в списке валют вашего кошелька MetaMask. Теперь вы сможете отправлять и получать добавленный токен так же, как и любой другой актив в кошельке.
Обзор особенностей и преимуществ Fantom
Fantom — это быстрая и масштабируемая блокчейн-платформа, которая поддерживает децентрализованные приложения (dApps). Ниже представлен обзор некоторых ключевых особенностей и преимуществ сети Fantom:
Высокая пропускная способность транзакций: сеть Fantom быстра и масштабируема, она способна обрабатывать до 300 000 транзакций в секунду. Это делает ее одной из самых быстрых блокчейн-платформ на данный момент.
Низкие комиссии за транзакции: сеть Fantom предлагает низкие транзакционные сборы, что значительно снижает стоимость отправки транзакций и взаимодействия с dApps.
Совместимость с Ethereum: сеть Fantom совместима с Ethereum. А значит, dApps на базе Ethereum можно легко перенести в сеть Fantom. Также пользователи могут быстро перевести свои активы на базе Ethereum в сеть Fantom.
Вознаграждения за стейкинг: сеть Fantom вознаграждает пользователей, которые поддерживают механизм консенсуса сети с помощью стейкинга. Это стимулирует пользователей вносить свои токены в стейкинг для поддержки безопасности и стабильности сети.
Интероперабельность: сеть Fantom совместима с другими блокчейн-платформами, что позволяет беспрепятственно передавать цифровые активы и данные между различными сетями.
Поддержка смарт-контрактов: сеть Fantom поддерживает разработку смарт-контрактов, позволяя разработчикам создавать сложные dApps и автоматически выполнять децентрализованные криптовалютные транзакции.
Децентрализованное управление: сеть Fantom управляется децентрализованным сообществом держателей токенов, которые могут голосовать за предложения и принимать решения о будущем сети.
Сеть Fantom предлагает ряд возможностей и преимуществ, которые делают ее привлекательной платформой как для разработчиков, так и для пользователей. Скорость, масштабируемость, низкая плата и совместимость делают ее одной из наиболее перспективных платформ децентрализованных финансов (DeFi) и других блокчейн-приложений.
Возможности Fantom
Сеть Fantom поддерживает разработку широкого спектра децентрализованных приложений (dApps), в том числе:
Децентрализованные биржи (DEX): сеть Fantom поддерживает развитие децентрализованных бирж, позволяя пользователям торговать цифровыми активами без необходимости в централизованном посреднике.
Приложения децентрализованных финансов (DeFi): сеть Fantom хорошо подходит для разработки различных DeFi-приложений, например, платформ для кредитования, заимствования и стейкинга.
Игровые приложения: в сети Fantom можно разрабатывать игровые приложения с применением технологии блокчейн, например, реализовывать механики с NFT и торговлей игровыми предметами.
Управление цепочками поставок: в сети Fantom можно разрабатывать приложения для управления цепочками поставок, которые используют технологию блокчейн для повышения прозрачности и отслеживаемости.
Верификация личности: сеть Fantom можно использовать даже для разработки систем проверки личности, использующих технологию блокчейн для повышения безопасности и конфиденциальности.
Децентрализованные социальные сети: в сети Fantom можно разрабатывать децентрализованные социальные сети, которые дают пользователям больше контроля над своими данными и конфиденциальностью.
Децентрализованные энергетические системы: в сети Fantom можно разрабатывать децентрализованные энергетические системы, которые используют технологию блокчейн для отслеживания потребления энергии и стимулирования производства возобновляемой энергии.
Сеть Fantom поддерживает широкий спектр dApps, предлагая разработчикам и пользователям всевозможные варианты использования технологии блокчейн. Кроме того, скорость, масштабируемость и низкие комиссии платформы делают ее привлекательной для пользователей и разработчиков децентрализованных приложений.
Тандем Fantom и MetaMask — это скорость, масштабируемость и интероперабельность
Интеграция Fantom с MetaMask дает пользователям повышенную гибкость и доступ к растущей экосистеме dApps сети Fantom. Сеть Fantom быстра, масштабируема и инклюзивна. Она предлагает разработчикам и пользователям широкий спектр вариантов применения технологии блокчейн, включая приложения DeFi, игры, управление цепочками поставок и многое другое.
С помощью этого пошагового руководства пользователи могут легко добавить Fantom в кошелек MetaMask, что позволяет управлять цифровыми активами Ethereum и Fantom из одного кошелька. Более того, интеграция Fantom с MetaMask обеспечивает быстрые транзакции по низкой цене и дает доступ к широкому спектру dApps и услуг.
Криптовалютная сфера продолжает расти и развиваться, поэтому возможность интеграции различных блокчейн-платформ и сетей будет становиться все более важным фактором. Интеграция Fantom с MetaMask является лишь одним из примеров того, как различные платформы могут работать вместе, обеспечивая удобство пользователей, а также улучшая доступ и принятие технологии блокчейн в целом.
Часто задаваемые вопросы
Как добавить NFT Fantom в MetaMask?
Чтобы добавить NFT Fantom в кошелек MetaMask, нужно привязать к кошельку сеть Fantom, затем перейти на сайт или торговую площадку, где вы получили или купили NFT, и нажать «Добавить в кошелек» или «Подключить кошелек». Далее выберите MetaMask как желаемый кошелек и подтвердите транзакцию. После подтверждения транзакции NFT появится в разделе «Активы» вашего кошелька MetaMask. Всегда следуйте инструкциям сайта или торговой площадки, где вы получили NFT, и храните кошелек MetaMask в безопасности.
Работает ли Fantom с MetaMask?
Да, Fantom работает с MetaMask. MetaMask — это популярный кошелек, который широко используется в экосистеме Ethereum. Однако с ростом числа блокчейн-платформ и dApps, особенно привлекательным становится такой кошелек, который совместим сразу с несколькими блокчейнами. Благодаря интеграции с MetaMask, пользователи могут управлять своими цифровыми активами на базе Ethereum и Fantom из одного кошелька, что облегчает отслеживание и упрощает процесс управления активами.
Как добавить FTM в MetaMask Mobile?
Чтобы добавить FTM в MetaMask Mobile, откройте приложение, нажмите «Добавить токен», выберите «Пользовательский токен», введите адрес контракта FTM и заполните поля «Символ токена» и «Десятичное значение». Затем нажмите «Добавить токен». FTM появится в вашем кошельке MetaMask в разделе «Активы».
Является ли FTM криптовалютой ERC20?
Нет, FTM (Fantom) не является токеном ERC-20. И хотя сеть Fantom совместима с Ethereum и поддерживает разработку dApps на базе Ethereum, FTM является нативным токеном Fantom. Он используется в качестве нативной валюты для оплаты транзакций и обеспечения безопасности сети посредством стейкинга. В отличие от токенов ERC-20, FTM не зависит от сети Ethereum и работает в блокчейне Fantom. Однако FTM может быть подключен к Ethereum с помощью различных кроссчейн-мостов, что обеспечивает совместимость между двумя сетями.
How to Import NFTs Into Metamask (Complete Guide With Pics)
Do you own an NFT that doesn’t show up in your Metamask wallet? If so, you’re not alone as I’ve had this exact problem. Although it’s nothing to panic about, it’s still annoying. So, how do you add your NFT to Metamask?
Below, I’ll show you how to import NFTs into Metamask in five simple steps.
How to Add an NFT to Metamask
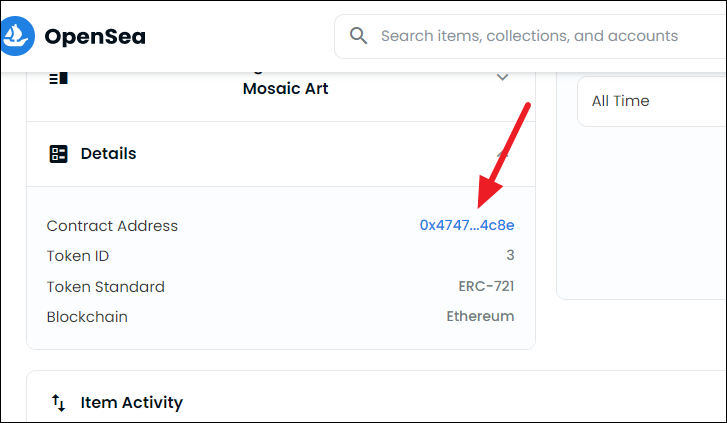
1. Copy your NFT’s Contract Address and Token ID from Opensea
Go to Opensea to gather the address and token id
- Contract Address
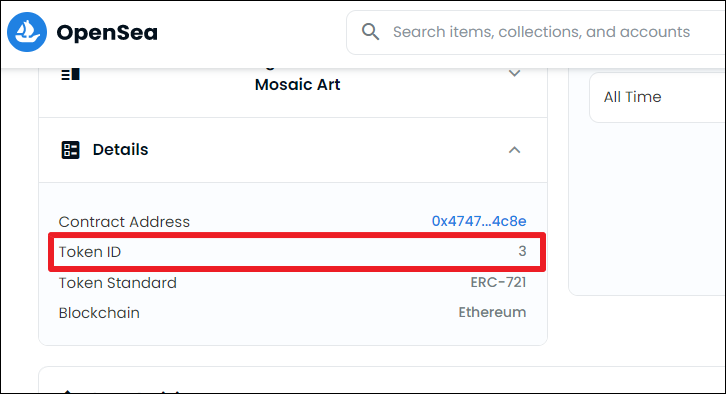
- Token ID
Don’t worry if you’ve never heard of either of these before, I’m going to show you exactly where to find them.

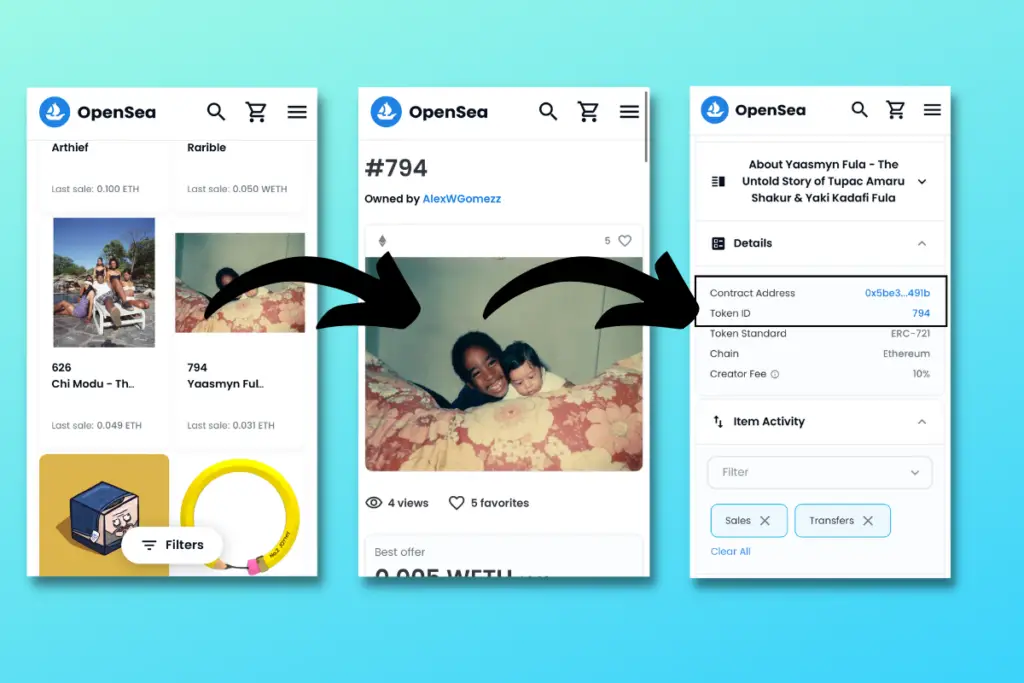
The easiest way to find these items is by signing into Opensea and copying them from there. Once you’re signed in, go to the NFT that you’re trying to add to Metamask and click on it.
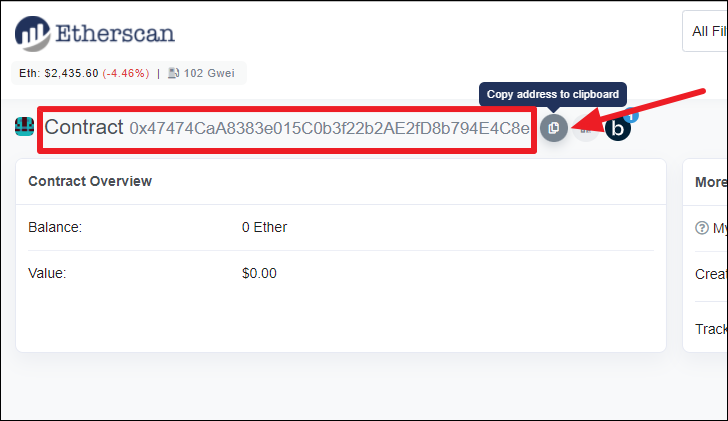
From there, scroll down until you see ‘Details’. Then, copy the ‘Contract Address’ and the ‘Token ID’. To copy the address, click on it. You will then be taken to Etherscan where you can copy it.
If the token id is short, it’s easiest if you can just remember it. Many NFTs’ token ids are only a few numbers long. However, if you can’t remember it, make sure to record it somewhere besides your mobile device.
The reason being is that you can only copy one string of text at a time. And once you’re in Metamask at the import page, you can’t exit to grab the other number because it will restart the process.
2. Sign in to your Metamask wallet
Once you’ve copied the contract address and recorded the token id in an easily accessible place, sign in to your Metamask wallet. Make sure the wallet you’re using is the one that owns the NFT, otherwise, this won’t work (believe me, I’ve tried it).
Please note that you can only import and view NFTs on the Metamask mobile app. Importing NFTs on the desktop extension is currently not an option.
3. Navigate to the ‘NFTs’ tab
Navigate to the NFTs tab
In the Metamask mobile app go to the ‘Wallet’ tab and then the ‘NFTs’ tab. This tab is where you can view and import your tokens.
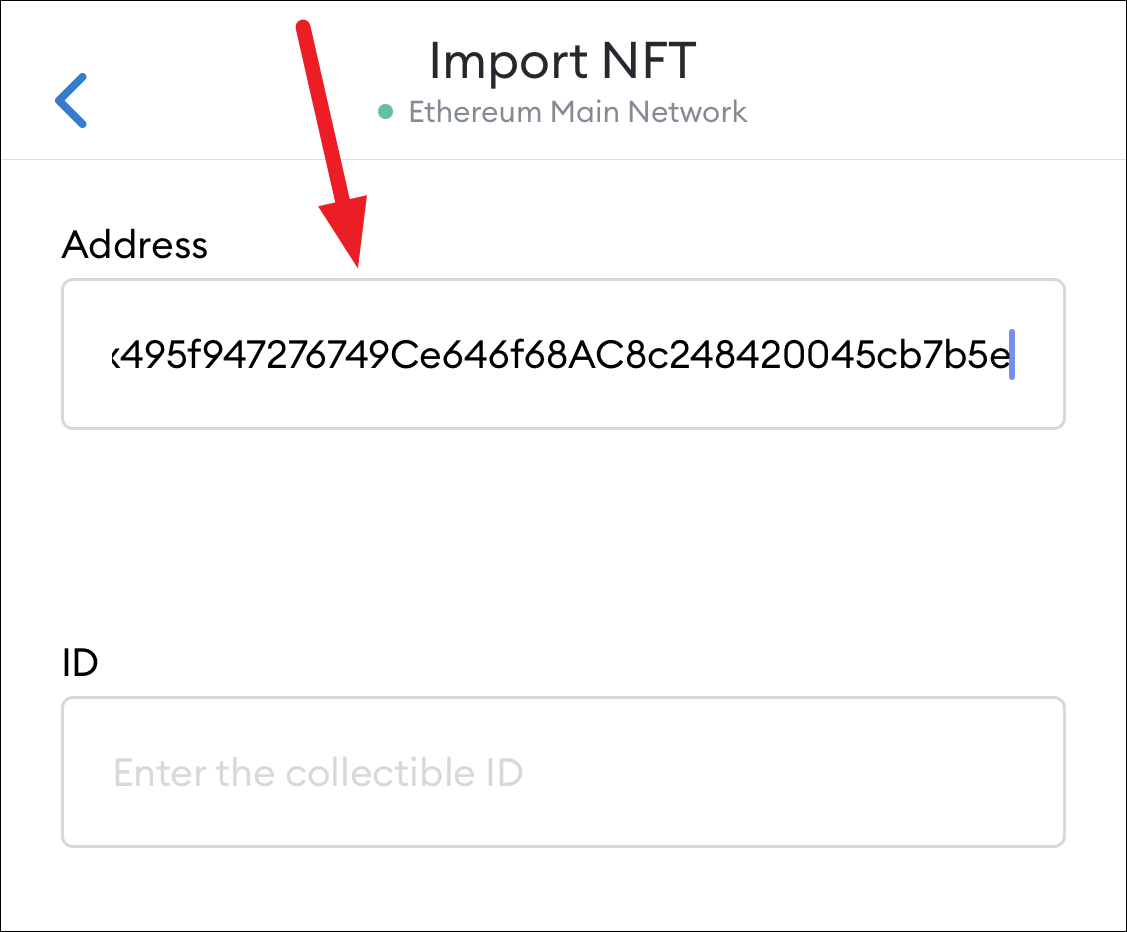
4. At the bottom, press ‘Import NFTs’
Scroll to the bottom of the NFTs tab and tap import NFTs. This will bring up the two fields where you can enter the info that you gathered earlier.
5. Paste your NFT’s info into Metamask
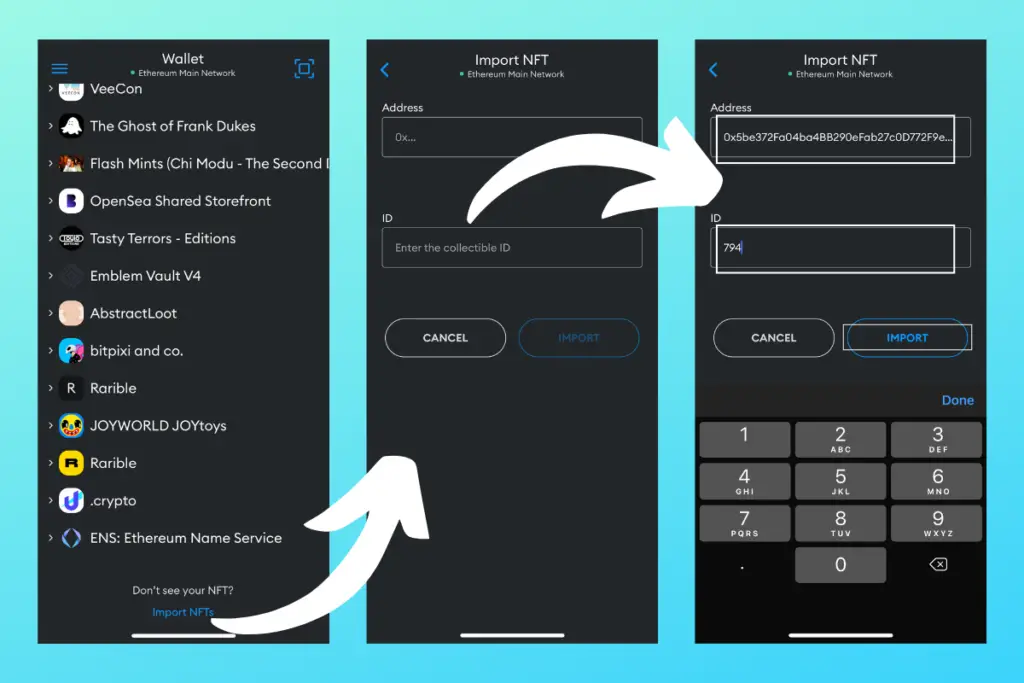
Paste NFT info into Metamask
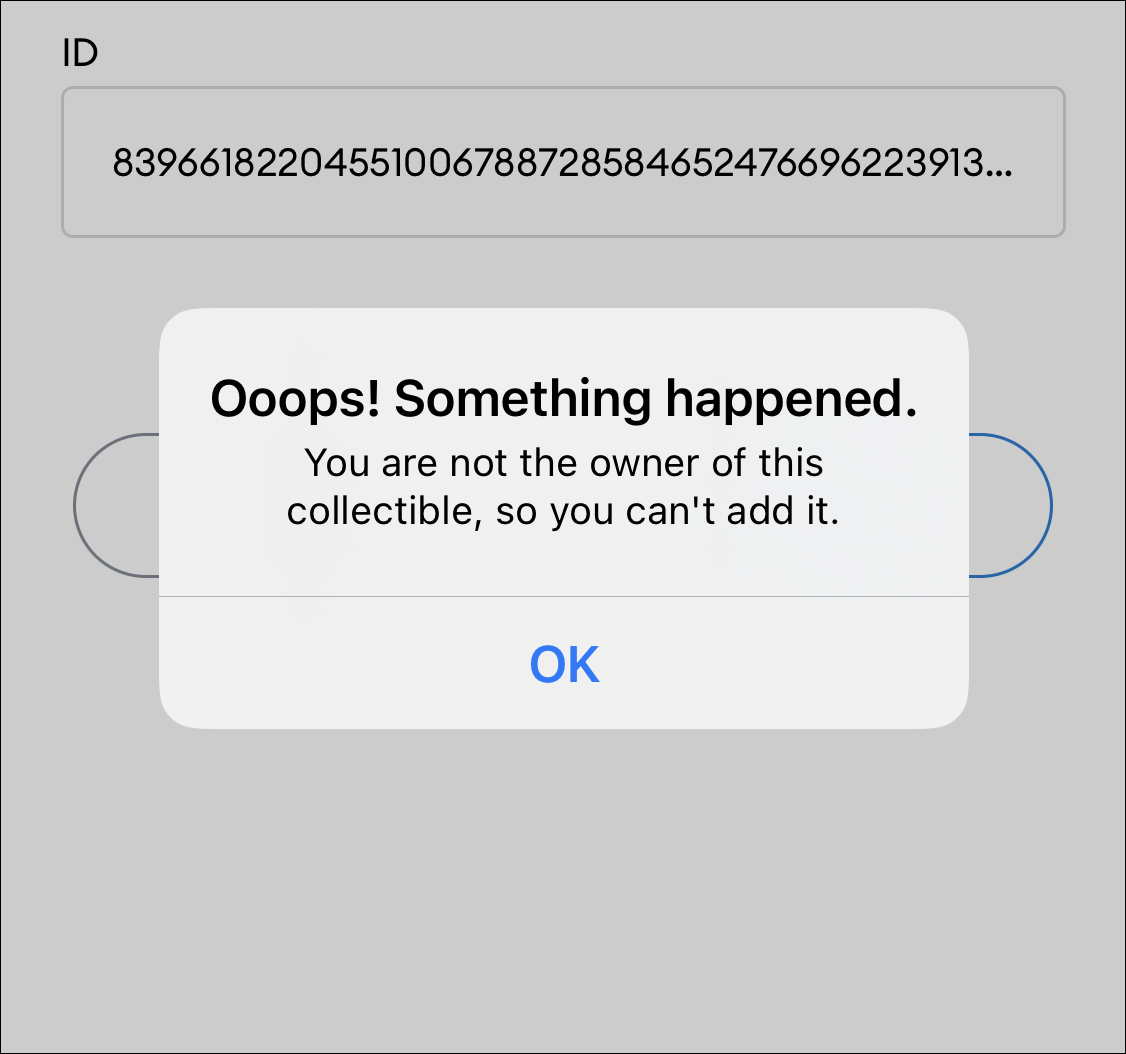
Paste your NFT’s contract address and enter the token id. If you’ve entered something wrong or if you don’t own the asset, you will get an error message.
If you’ve entered everything correctly and you own the token, you can now press ‘Import’. And just like that, your NFT has been added to your Metamask wallet. You can view it in the NFTs tab.
Why Is My NFT Not Showing Up in MetaMask?
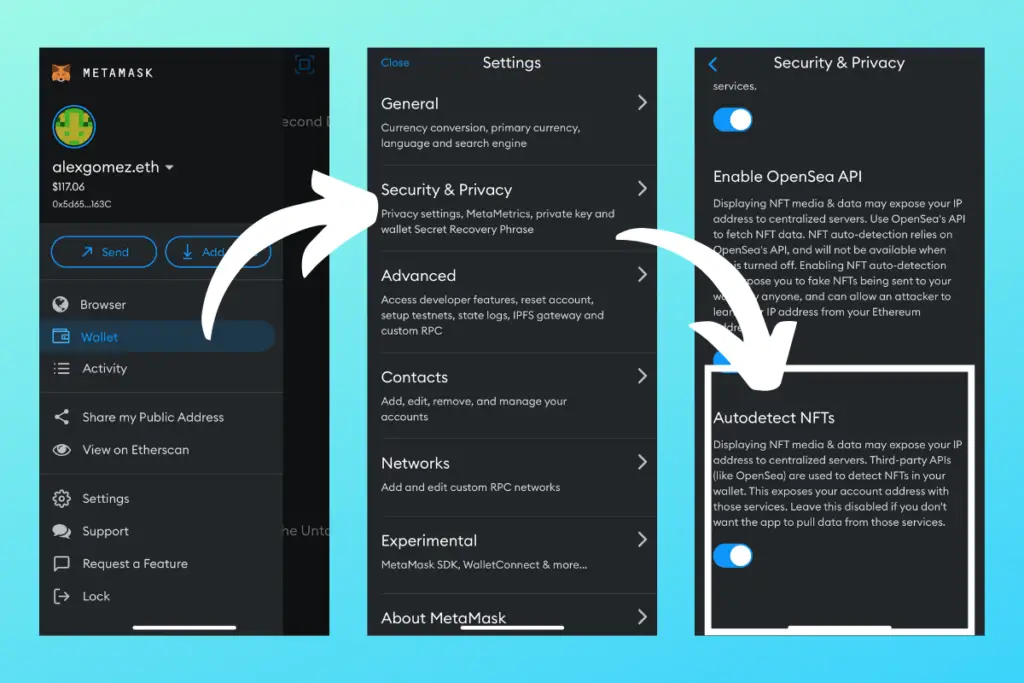
Autodetect NFTs option
NFTs do not appear on the Metamask chrome extension, you can only view them using Metamask Mobile under the NFT tab. If your NFTs don’t show up automatically, turn on the autodetect feature. To enable this feature go to your wallet’s Settings, Security and Privacy, then enable Autodetect NFTs.
I must warn you though, turning on the autodetect feature exposes your IP address to centralized servers in addition to third-party APIs, like Opensea, pulling your account address and exposing them to these services.
If you don’t want Metamask to pull this data from those services, leave the autodetect feature disabled.
Personally, I’ve had this feature enabled for a while now with zero known issues. But, you never know.
In most cases, especially in web3, it’s usually better to approach these types of concerns with extreme caution (don’t say I didn’t warn you).
Will I Lose My NFT If I Reset Metamask?
You will not lose your NFTs or other digital assets if you reset or delete your Metamask account. Your NFTs exist on the blockchain and are not related to Metamask. Your wallet is simply a tool used to access the blockchain. You can always recover your accounts using your Secret Recovery Phrase.
Both a wallet reset and an account reset will not result in losing your digital assets. But wait, isn’t it the same thing? It’s not, here’s the difference.
Wallet reset
Resetting your wallet returns your Metamask extension or Mobile app to its original state. Hence, it clears your Secret Recovery Phrase along with all your account info from the software.
If you reset your wallet, you’ll need to re-enter your recovery phrase to gain access to your wallet and your assets.
- You want to create a new MetaMask wallet with a new Secret Recovery Phrase.
- You want to reset your password.
To reset your wallet using the mobile app, simply lock your wallet and then tap ‘Reset Wallet’. If you want to reset your wallet via the Chrome extension, uninstall and reinstall the extension.
Account reset
An account reset wipes your transaction history while still keeping your wallet in Metamask. This means you won’t need to re-enter your Secret Recovery Phrase. Generally, an account reset is used to resolve stuck and pending transactions.
That said, account resets are usually executed by developers who need to reset a test network while continuing to use the same account.
If you are going to reset your account, Metamask recommends downloading your state logs beforehand. This helps their support agents to troubleshoot the root cause of whatever issue you might be experiencing.
You can download your state logs by going to your wallet’s Settings, Advanced, then Download State Logs.
- On the Extension, click the account icon in the top-right corner. On Mobile, tap the hamburger icon in the top left.
- Select Settings.
- Select Advanced.
- Scroll down and click ‘Reset Account‘.
Should I Store My NFT in Metamask?
Metamask is one of the most popular crypto wallets in the world, but should you store your NFT in it?
You should not store your NFT in Metamask. Since it’s a software wallet, it’s always connected to the internet making it susceptible to scammers and hacks. The best option for storing your NFT is a hardware wallet like Ledger. Hardware wallets keep your private info stored offline.
The main reason why Metamask is a poor choice for storing your digital assets is that it can easily be hacked.
By simply connecting your wallet to a malicious website, your wallet along with all your assets can be gone in the blink of an eye.
And if you think this could never happen to you, you’re wrong. Scams happen every day. Not only to newbs either, but even to experts. Holding my Ledger NFT wallet
Metamask is a good option for buying and selling NFTs, but it should never be considered a storage solution.
What do I mean by this? I’m glad you asked.
When collecting NFTs and other digital assets, it’s best to utilize two wallets. One wallet should be used to transact, while the other one (preferably a hardware wallet) should be used solely for storage.
For example, you can use Metamask to buy a $10,000 NFT, but you should immediately transfer that NFT to your hardware wallet for safekeeping. Then, if you decide to sell that asset, transfer it back to your software wallet before listing it.
This ensures your Metamask wallet remains empty in case you do get scammed. By keeping your assets secured in a wallet that’s only used for storage, you can greatly reduce the risk of losing all your assets.
Software and hardware wallets both have their place in the space, no doubt, along with a list of pros and cons, but it’s worth researching further if you’re serious about keeping your assets safe.
How to Add NFT to MetaMask
Easily add your NFT in the MetaMask wallet if it's missing from the list with these simple instructions.

NFTs may have been around for some years now but the boom they are experiencing now is unreal. Everyone’s scrambling to eat a slice of this cake and it’s not just the crypto geeks anymore.
But no matter how excited you are to become a part of this world, it’s also true that it can be a little bit overwhelming given their complicated nature. There are a lot of things to learn when you’re a newbie. And given how vulnerable the whole setup can be, it’s important to get the basics right.
But whether you’re a newbie or not, one thing that’s most important is security. And a wallet helps you achieve that. MetaMask is one such wallet that makes the world of web3 accessible to you on multiple devices. You can use the wallet in a mobile app and also your desktop browser. It’s the perfect place to store your digital assets.
But it’s also true that you can have a little trouble with certain kinds of digital assets (psst! we mean NFTs) on MetaMask. Don’t worry, though. We’ll help you solve all these troubles.
NFTs in MetaMask
Managing fungible tokens on a wallet is very easy. But non-fungible tokens can be an altogether different matter. Non-fungible tokens aren’t the same as fungible tokens. And there are also many scams in the NFT market.
Whether you buy an NFT, swap it, or someone gifts it to you, you’ll turn to your wallet to know whether it’s secure or not. After all, that’s one of the main purposes of using a good crypto wallet; it’s supposed to store your assets securely.
And MetaMask is a great wallet for NFTs. It supports ETH-based NFTs but can also be tweaked to support NFTs from other blockchains, such as Binance Smart Chain. Your NFTs from the Ethereum blockchain should automatically appear in your wallet – MetaMask uses opensea.io and IPFS to pull their NFT data. But that’s not always the case. You’ll find that some of your NFTs might not appear in the wallet correctly or sometimes they don’t appear at all.
Note: MetaMask browser extension does not have support to view NFTs. While you can add them as custom tokens (which we’ll learn how), you won’t be able to view them natively in the UI. MetaMask mobile app is the best solution to manage your NFTs as of now though the team is working to bring it to the browser extension as well.
Your NFTs are always stored in your wallet. Adding an NFT just allows you to see the token there. That’s precisely why you can only add NFTs you own to MetaMask. Because it’s just a way to view the non-fungible tokens you already own in the wallet. Trying to add an NFT you don’t own will result in an error.
Adding the NFT to your wallet isn’t the equivalent of buying one. Your wallet already stores the NFTs you buy from the address regardless of whether you are able to see it there or not. But being able to view them there gives one peace of mind, so let’s how exactly how you can do it.
Adding NFT from the MetaMask Mobile App
Install the MetaMask mobile app from the App or Play Store on your mobile device. If you set up your MetaMask wallet from the browser extension, you’ll have to import the wallet using your Secret Recovery Phrase. Importing the wallet is as easy as entering the secret recovery phrase and setting a new password for the wallet.
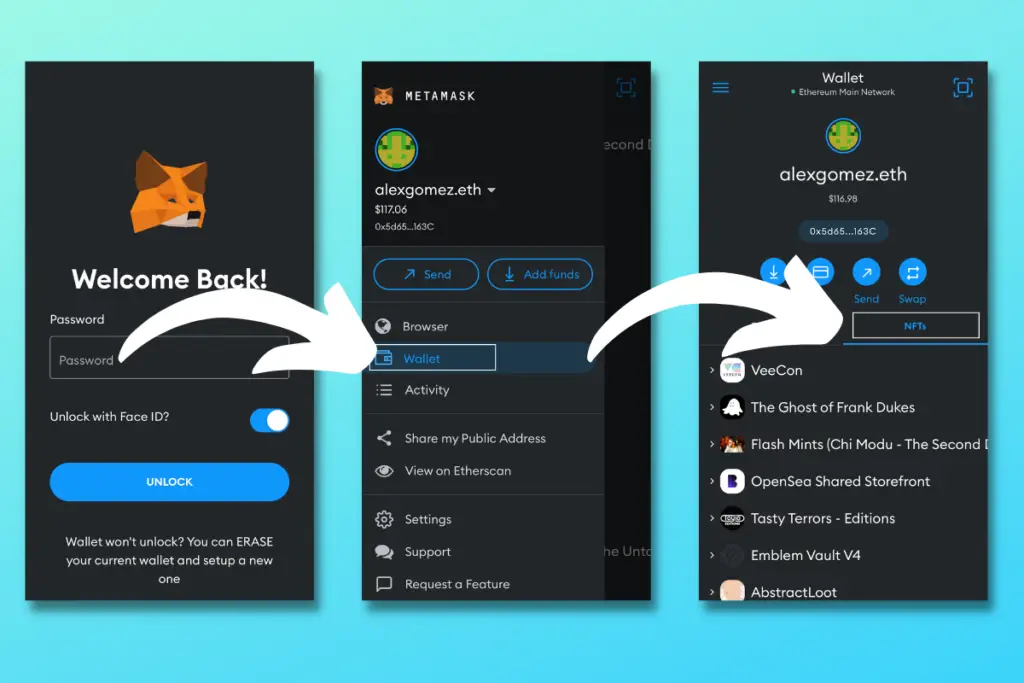
Then, go to the wallet in the app. If it isn’t already open, tap the ‘hamburger menu’ (three stacked lines) in the upper-left corner to go to your wallet.
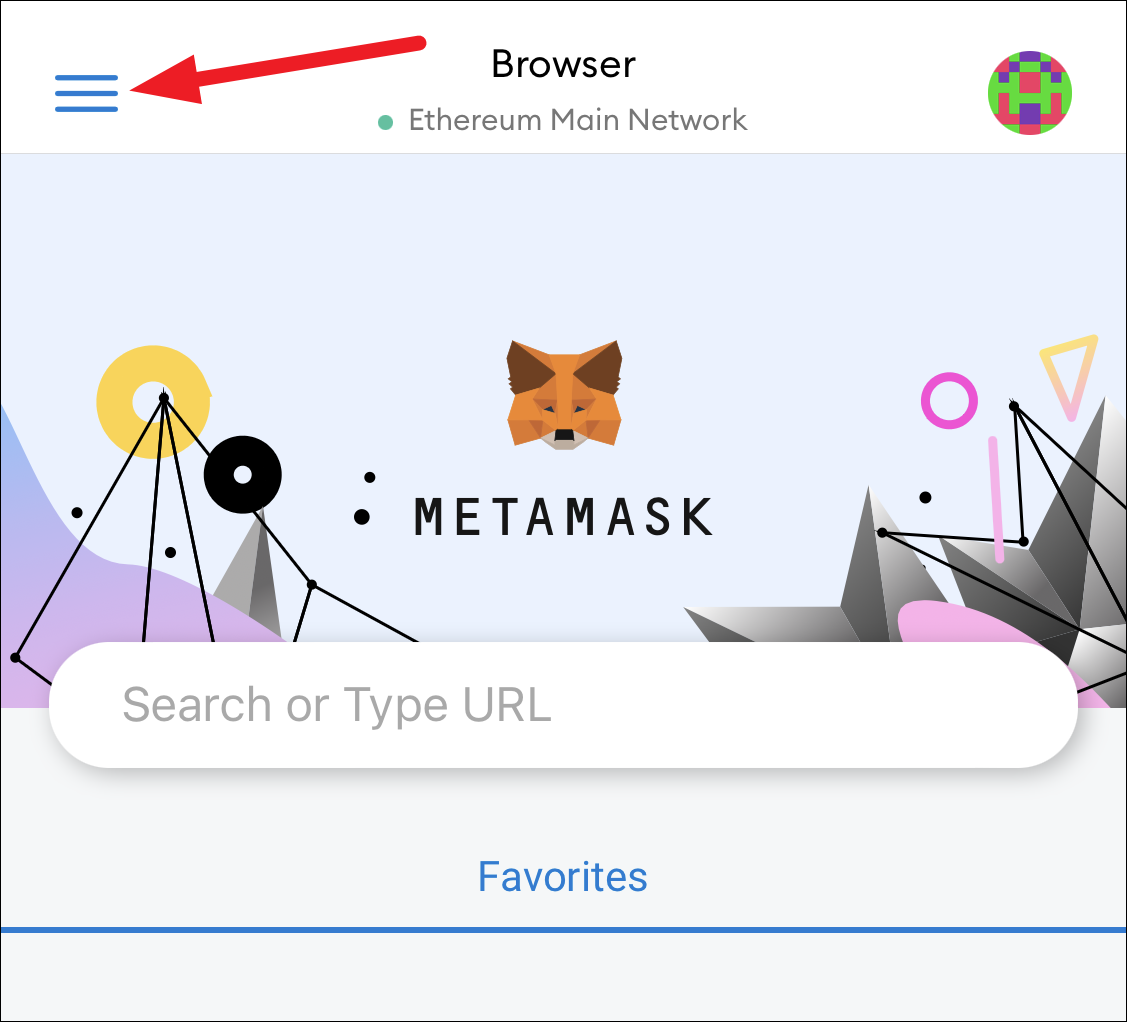
Then, tap ‘Wallet’ from the menu.
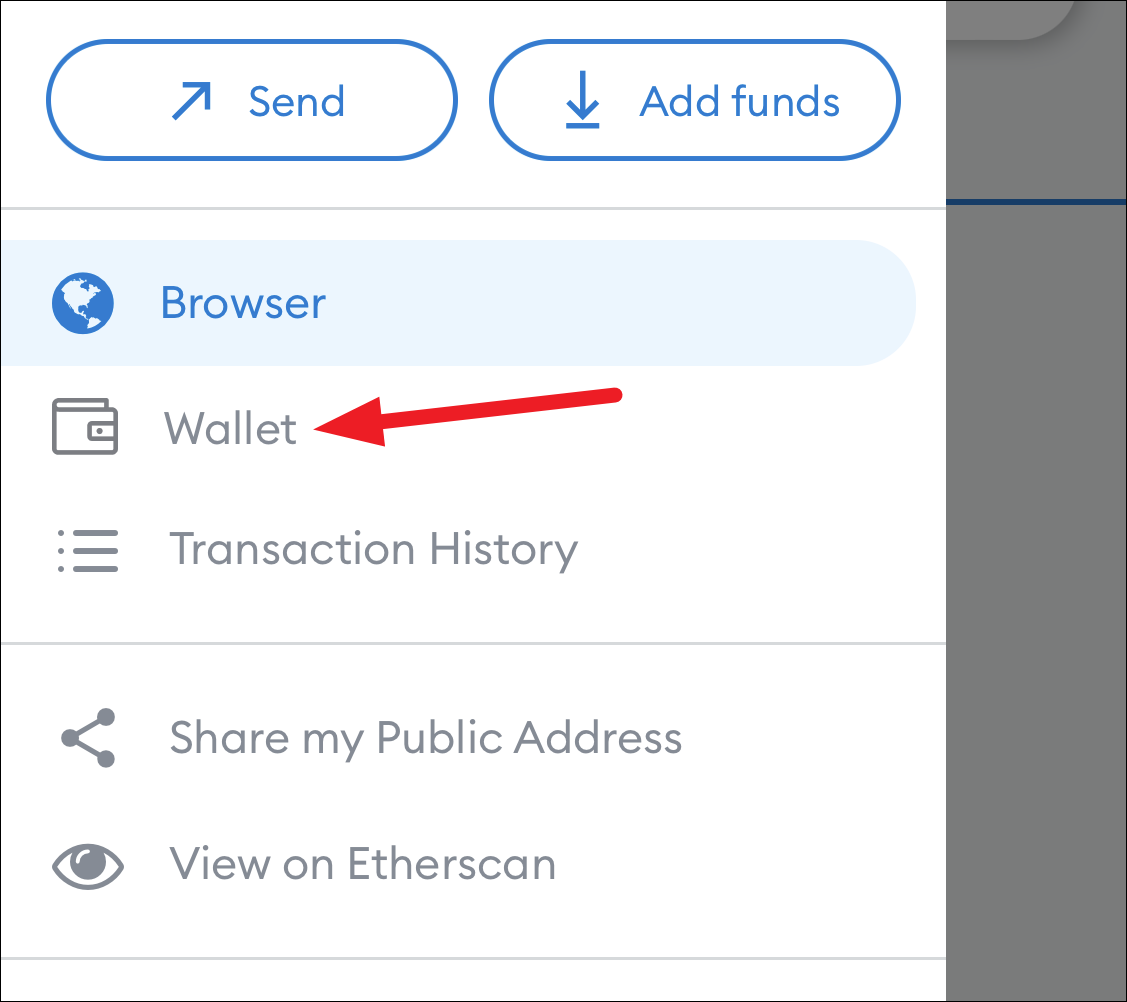
In the wallet, go to the ‘NFT’ tab.
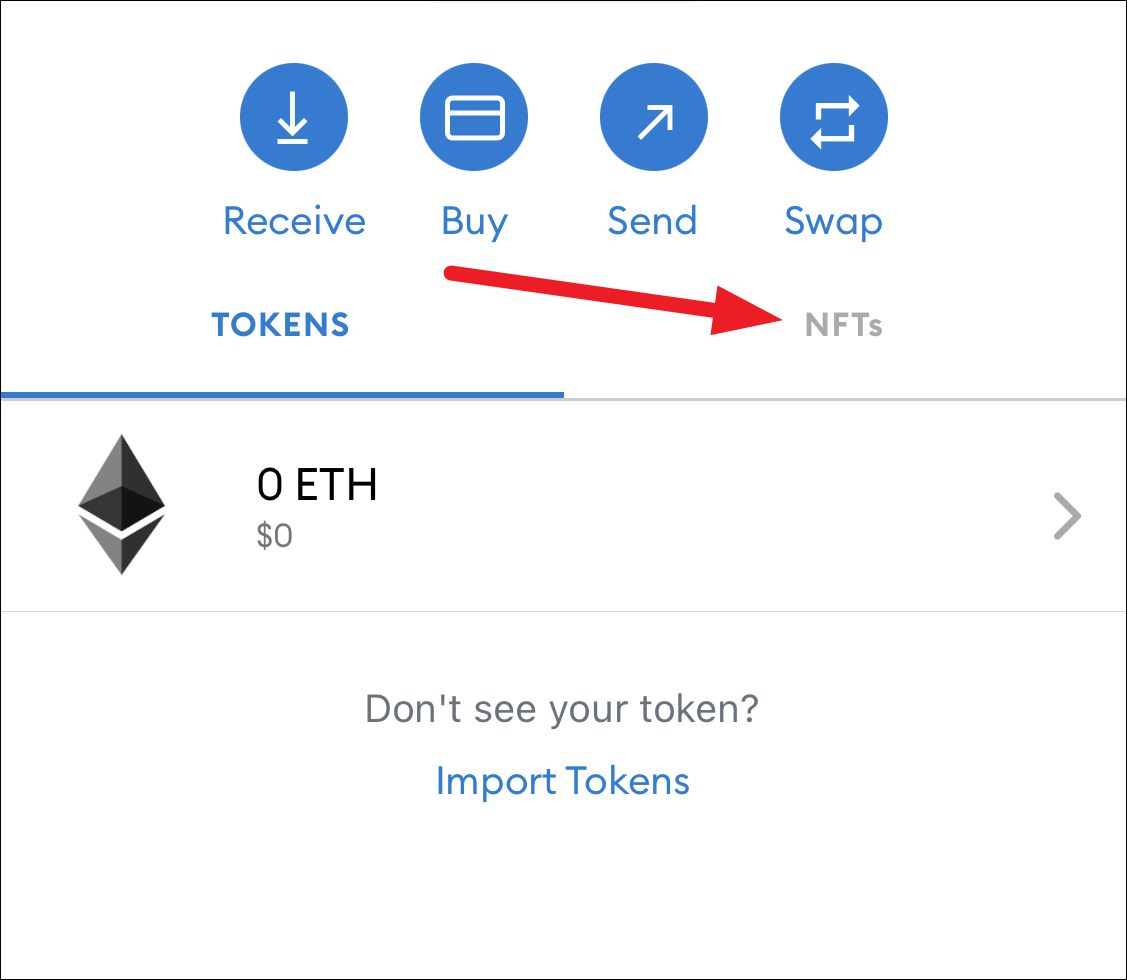
You can view your NFTs here. To add an NFT, scroll down and tap the option for ‘Import NFTs’.

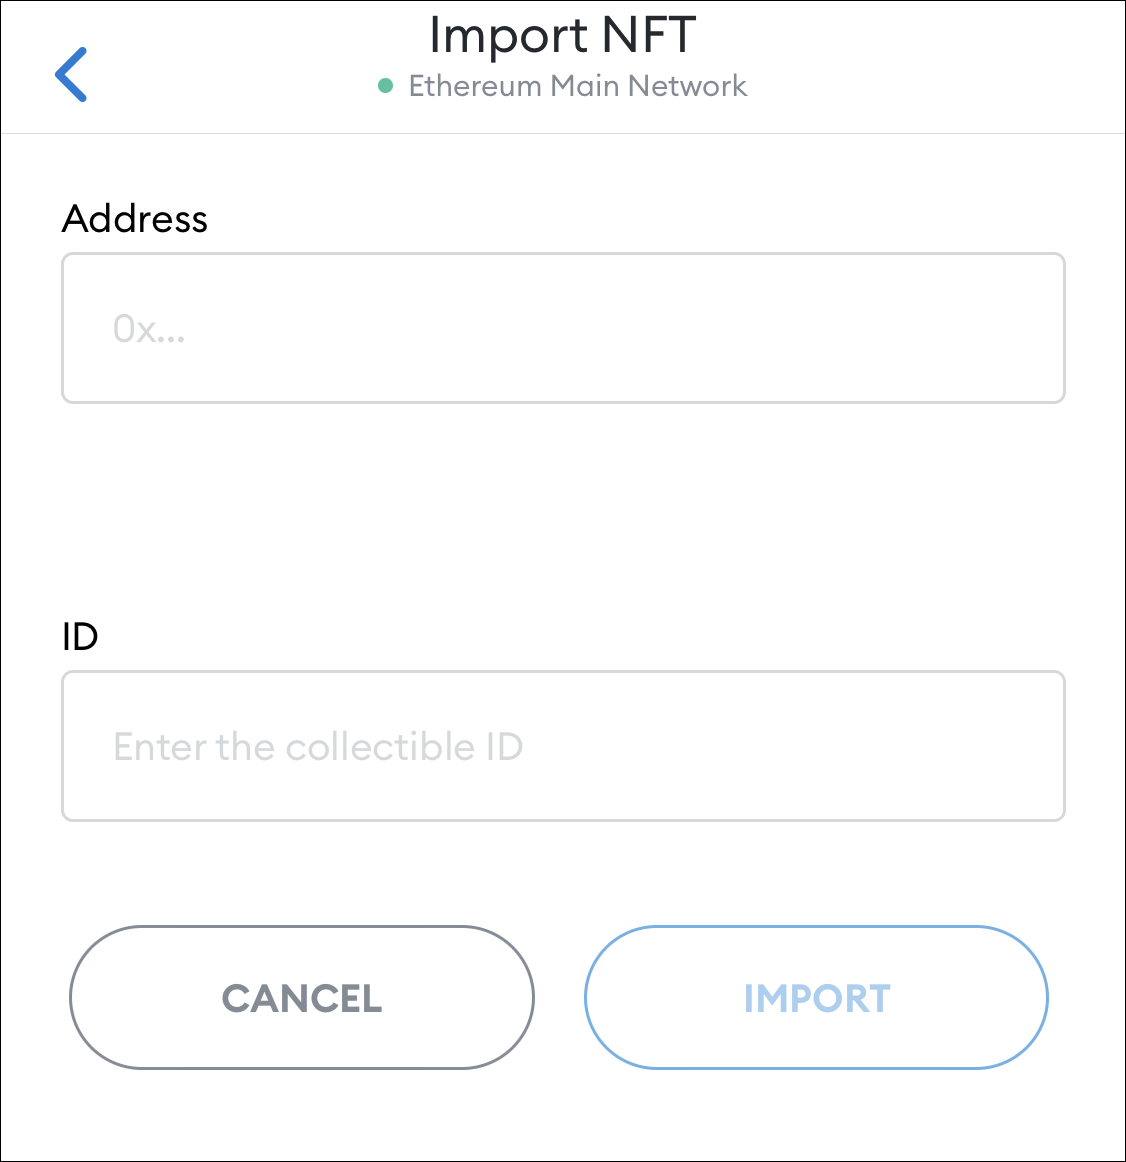
The screen for importing an NFT will open. To import an NFT, you need the address of an NFT along with its ID.
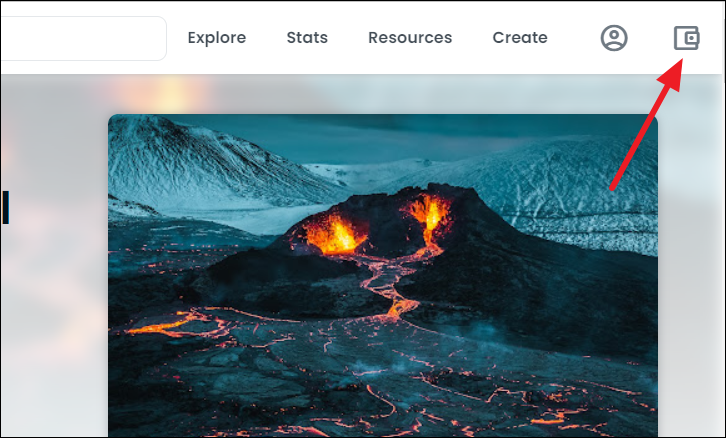
To find the address of an NFT, go to opensea.io. Make sure your wallet is connected to the marketplace. If it isn’t, click the wallet icon in the top-right corner to connect it.
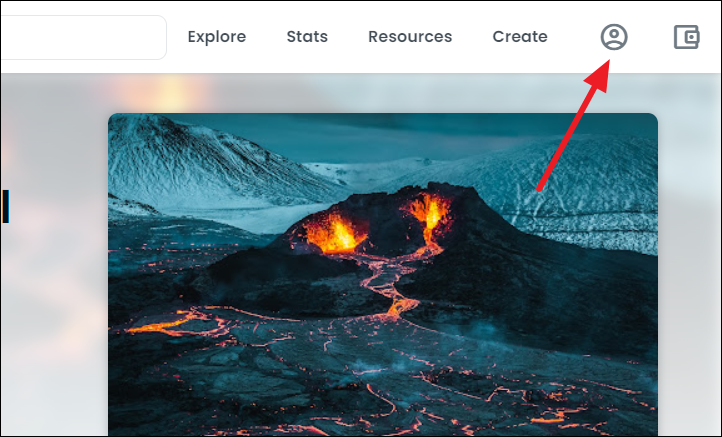
Then, go to your profile by clicking the ‘Profile’ icon in the top-right corner to view all your NFTs.
Tip: You can always use OpenSea to view all your NFTs at any time from your browser.
Click the NFT you want to add to your wallet. The listing page for the NFT will open. Scroll down and click the option for ‘Details’.
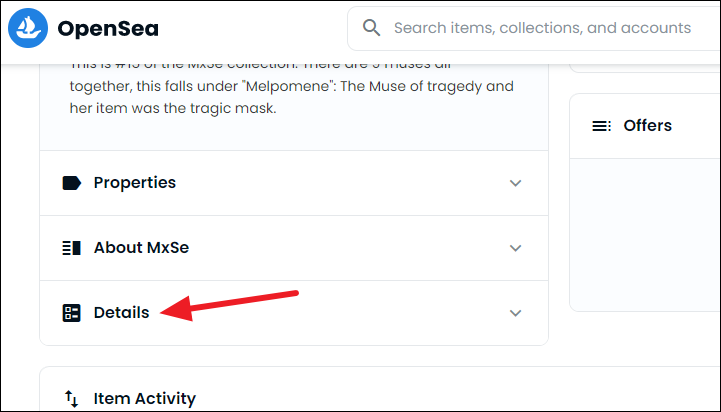
The option will expand. Click the ‘blue hyperlinked value’ next to ‘Contract Address’.
It’ll open the contract’s address on Etherscan. Towards the top-left corner of the page, you’ll find the option for ‘Contract’ with a long string of letters and numbers next to it. This is the address of the smart contract that created the NFT. Click the ‘Copy’ button next to it.
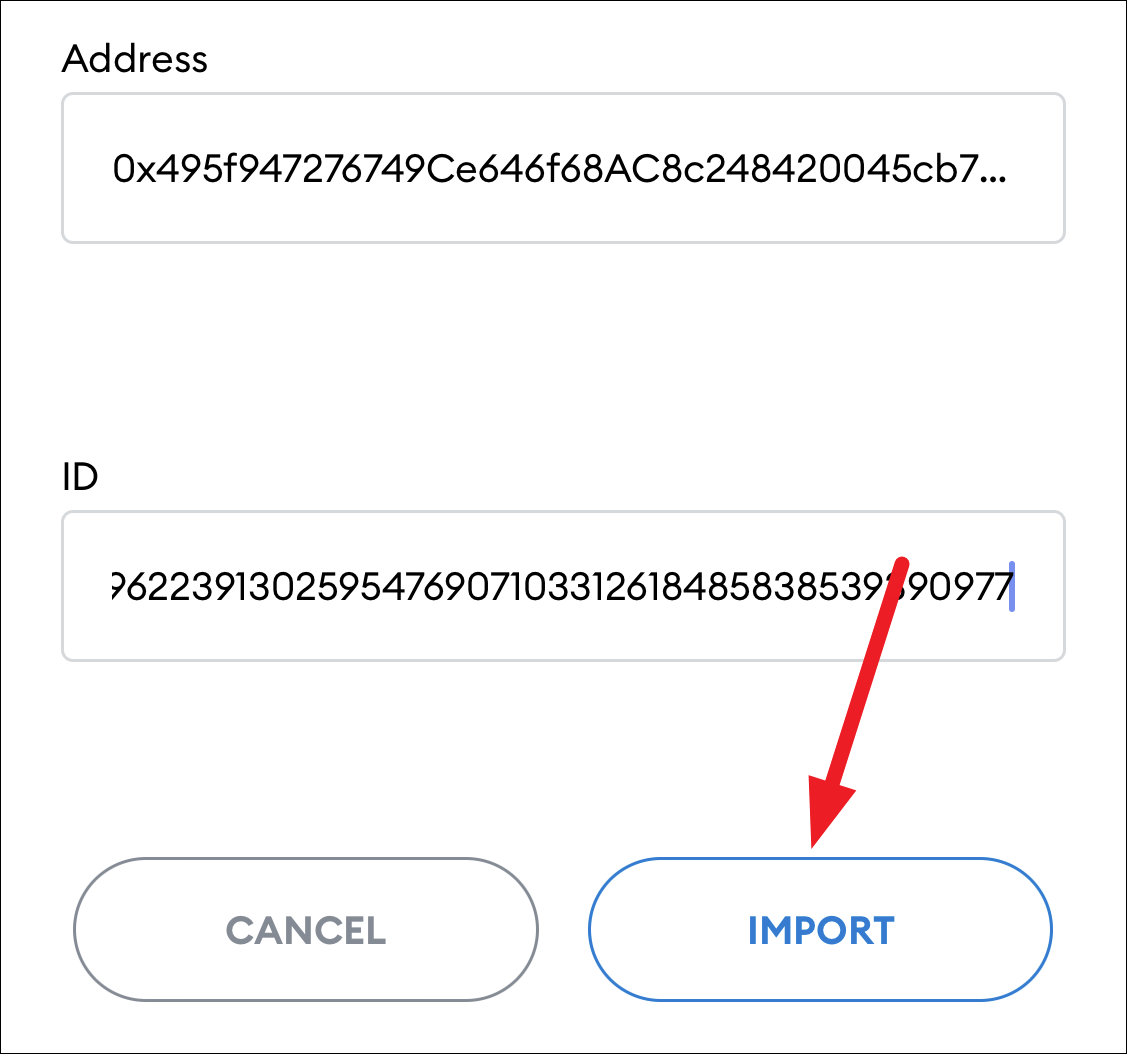
Then, paste the address in the ‘Address’ textbox in your mobile app in the Import NFT screen.
Now, you need the ID for the NFT. Since all NFTs are unique and no two are alike, each collectible has a unique identifier number, i.e., ID. Go back to the Details section on the NFT’s listing page on OpenSea. There you’ll find the ‘Token ID’; enter this number in the ID textbox in the mobile app.
Finally, tap the ‘Import’ button and your NFT will appear in your wallet.
Adding NFT from the Browser Extension
Although you cannot view the NFTs in the browser extension as there is no UI, you can still add it as a custom token.
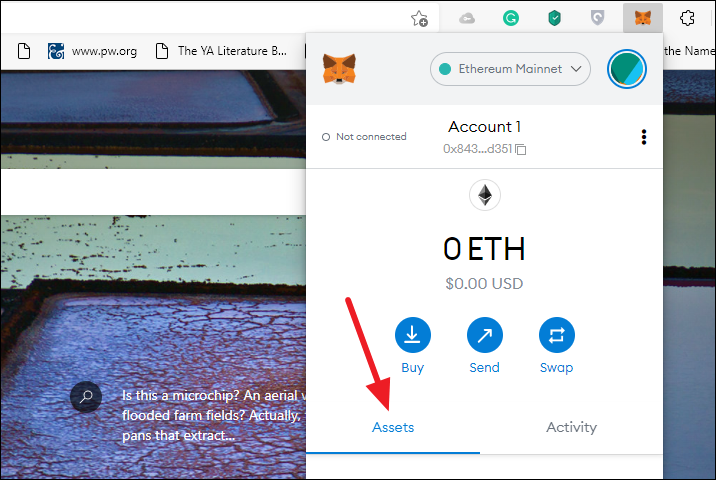
Click the extension icon on your browser to expand the extension menu. You’ll see, that, unlike the mobile wallet, there is no tab for NFTs here. The only options are ‘Assets’ and ‘Activity’. We’ll stay on the assets tab.
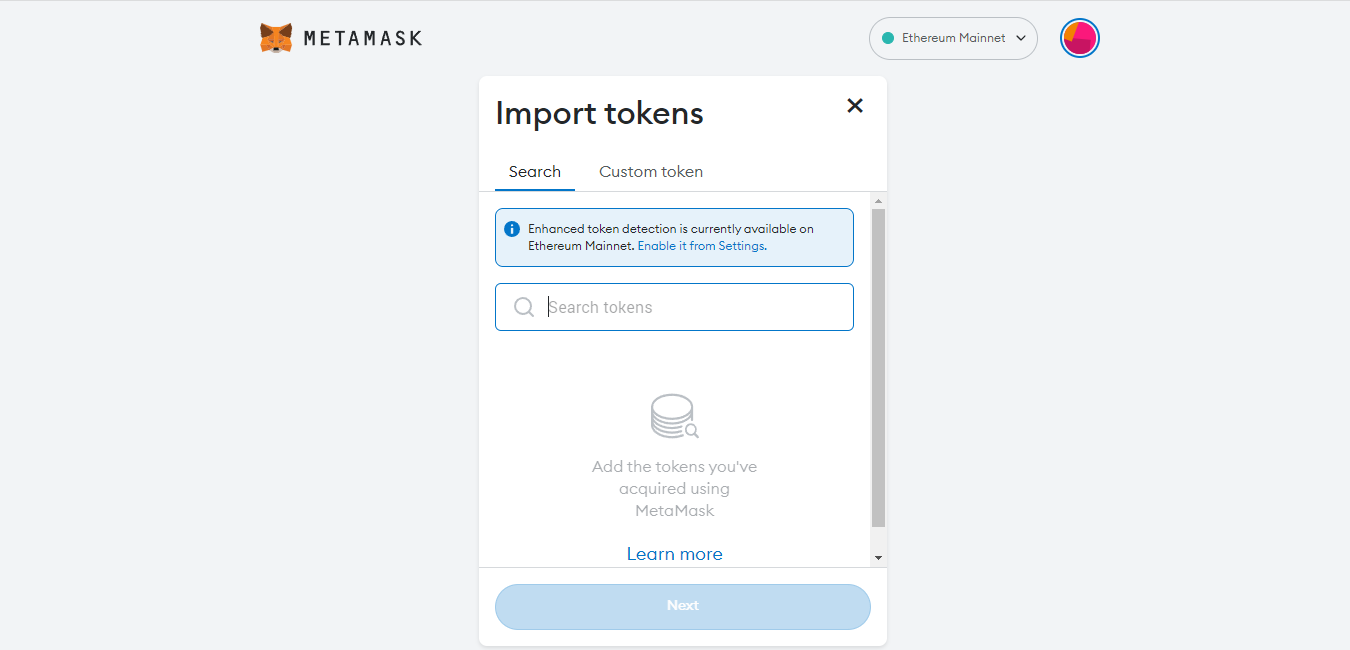
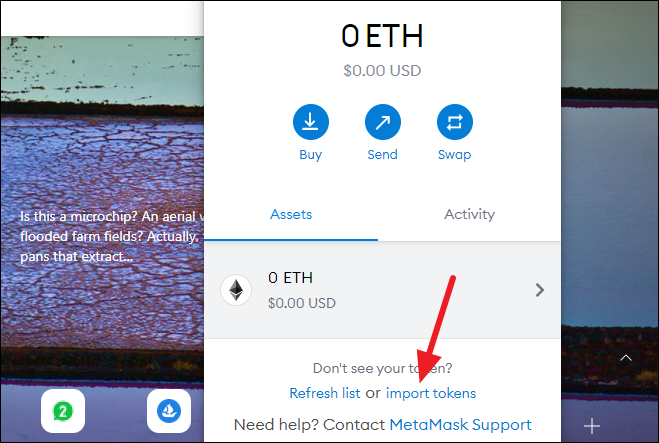
Click the ‘Import tokens’ option from the bottom of the screen.
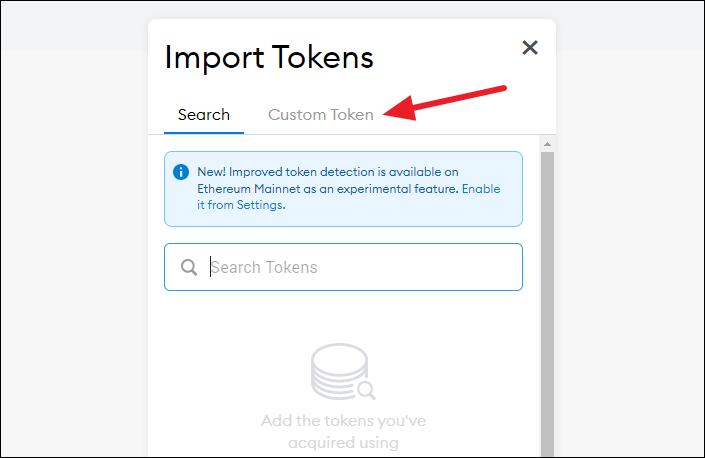
Then, switch to the ‘Custom Token’ option.
From OpenSea, go to the ‘Details’ section of the NFT and click the hyperlink next to ‘Contract’.
The link will take you to Etherscan. Copy the smart contract address of the NFT from Etherscan.
Then, paste it in the ‘Token Contract Address’ textbox in the extension.
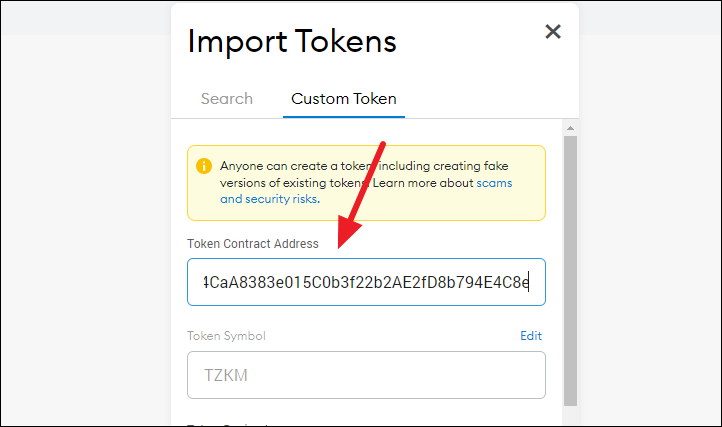
As soon as you enter the contract address, MetaMask will pick the ‘Token Symbol’ and fill the field on its own.
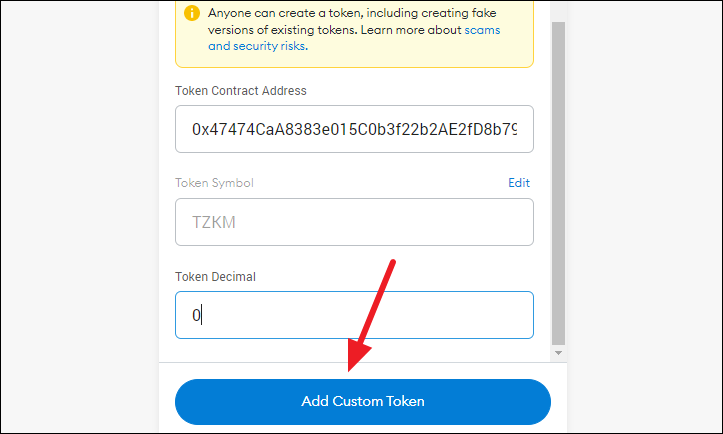
The only remaining option now is for ‘Token Decimal’. When adding an NFT, add ‘0’ (zero) in this field. Then, click the Add Custom Token’ or ‘Next’ button.
You’ll be able to see how your NFT token will be added to the wallet. If you’re satisfied with it, go ahead and click the ‘Import’ button.
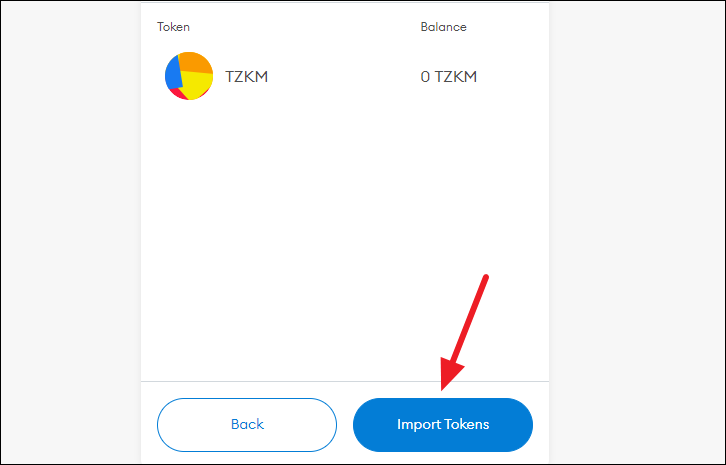
But if you even have the slightest of doubts, it’s better to use the mobile app to add the NFT.
Trouble with Some NFTs
It’s possible that after you add some of your NFTs, you might get an error in MetaMask. The error might say something like, “We had trouble loading your token balances.”
If that happens, there’s no need to panic. If you go to the details section for the NFT in question on OpenSea, you’ll find that the token standard for it is ‘ERC-1155’.
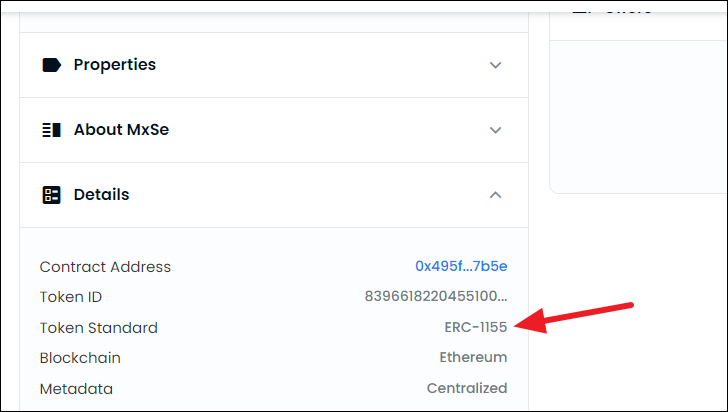
MetaMask does support storing of ERC-1155 tokens currently. But there are no interaction or management capabilities. Essentially, you cannot see the NFT in the extension or the mobile app, nor can you send them to anyone. Nonetheless, your wallet is securely holding it.
If you want to view it or even send it to someone as a gift, you can do it from OpenSea.
What to do if an Unexpected NFT appears in your wallet?
Sometimes, your wallet can have NFTs that you didn’t buy, swap, or receive from someone knowingly. These just seem to appear out of thin air. Some of these can be legitimate as airdropping has been around in blockchain for a long time. Airdropping – the act of gifting tokens to Ethereum wallet addresses – is often used to generate interest in a project.
But the practice is also related to a phishing scam in the community. So, if you ever receive a random NFT in your wallet, you need to exercise caution. Research the token or project to make sure it’s legit. Don’t scramble to sell or transfer it just because you received it for free.
It’s the most common setup for an airdrop scam – you try to swap the token you received in your wallet for free. But when you try to swap it, it reroutes you to some website instead. The website tries to get personal information from you. In some cases, it even asks for your secret recovery phrase. Some people end up sharing their secret recovery phrase and lose all access to the tokens in their wallets.
You should never, ever share your secret recovery phrase with anyone. Not even MetaMask would ever ask for your secret recovery phrase. Once someone has your secret recovery phrase, they don’t need anything else to access your wallet. And once someone has access to your wallet, they can cash out or transfer all your tokens before you even realize what has happened.
If you do end up with scam tokens in your wallet, better just leave them there. It is often when you try to take any action that ends up hurting you.
Other than the phishing scam, you should generally be aware of airdropped NFTs. They are also used to generate interest in a non-meritorious project. This practice is also known as rugpull in the community, which is often regarded as the equivalent of a traditional Ponzi scheme.
A wallet lets you manage your NFTs easily. But if you can’t find your NFT in the wallet, managing the token becomes out of the question. Fortunately, MetaMask makes it easy to add the tokens you can’t see in the wallet. That’s not to say that the wallet still doesn’t have a long way to go. There are a lot of features the wallet needs to add when it comes to supporting NFTs. But it’s still easier to work than most wallets out there, which is why it’s so popular in the community.