Как сделать резервную копию google authenticator
Двухфакторная аутентификация сейчас пользуется заслуженной популярностью. Аутентификация с использованием Google Authenticator — отличная альтернатива аутентификации на основе SMS сообщений.
Но вот вопрос — что делать если устройство потеряется? А как просто будет перенести данные для авторизации если у вас новое устройство?
Сейчас для того чтобы перенести авторизацию с одного устройства на другое нужно обнулить токены авторизации на одном устройстве и настроить их на другом. Хорошо если у вас только один аккаунт под управлением Google Authernticator — а если десять? У меня сейчас пять таких аккаунтов и их перенос для меня сильно проблематичен.
Не так давно я решил вопрос с потерей устройства регистрируя ключ на двух устройствах одновременно. Но вот у меня появился новый телефон. Проблема встала с новой остротой.
Хочется иметь возможность в любое время развернуть токены с одного телефона на другом. Желательно также, чтобы в любое время я бы имел возможность снести Google Authenticator и заменить его на любой другой, например, на FreeOTP.
Сел разбираться как это, вообще, работает. Оказалось, все до банальности просто. В момент, когда вы настраиваете двухфакторную аутентификацию с использованием Google Authenticator — генерируется секретный ключ, который запоминается на сервере и одновременно вы его фотографируете в виде баркода своим телефоном. Позднее, в момент авторизации — к секретному ключу добавляется текущее время округленное до тридцати секунд и от этого выражения рассчитывается sha1 контрольная сумма. Первые шесть чисел контрольной суммы и есть секретный код отображаемый на мобильном устройстве.
Оказалось, что задача резервного копирования решается не просто просто а очень просто! Значит, чтобы получить на двух телефонах одинаковые коды, нам всего лишь нужно знать этот "секретный" код. А ведь когда мы настраиваем аккаунт нам этот код показывают на экране! Дополнительно, его можно скопипастить в виде текста и сохранить в надежном месте! Далее, просто вводим этот код в ДРУГОЙ телефон и вуаля! Мы имеем ДВА телефона с одинаковыми кодами! Более того, теперь, в случае, если мы сбросили наш телефон до заводских настроек, мы всегда можем восстановить наш Google Authenticator как было!
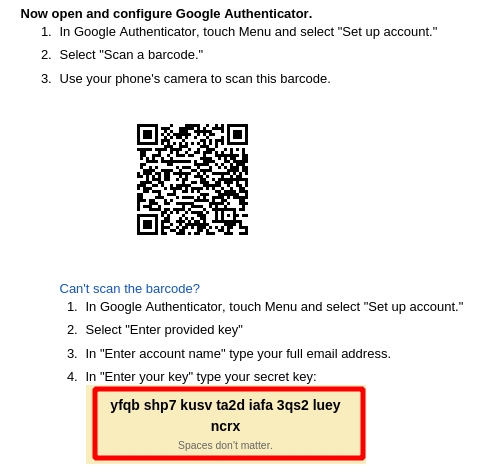
Таким образом, алгоритм подключения телефона дополняется дополнительным шагом — а именно — сохранением секретного ключа в секретном же месте. После чего, данный секретный ключ может быть введен на любом устройстве, в любое время! Кроме того, вы можете попробовать использовать любые другие OTP программы, например FreeOTP. Который, в отличие от Google Authenticator — полностью открытый и не имеет разрешений ходить в интернет. Да я теперь даже смогу использовать Pebble для авторизации!
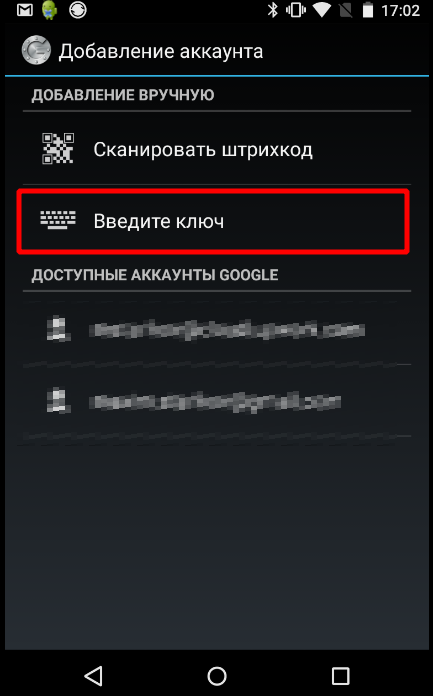
Конечно, такая практика несколько снижает криптостойкость всей схемы, ведь теперь секретный ключ хранится в нескольких местах, но тут уж каждый должен сам решать что ему важнее — надежность или проблемы в случае утери устройства.
комментарии:
Спасибо огромное! Это помоему единственный способ как переносить нормально инфу.
А полностью всё перенести так и не нахожу! Но зато этим способом можно раз и навсегда все перенести не заморачиваясь!
разрешены только теги br, font, span, p, strong, u, p, blockquote, a, div, img — остальные будут безжалостно удаляться
How to Backup and Restore Google Authenticator

Google Authenticator is a straightforward app when it comes to two-step authentication.
Unlike its rival apps like Microsoft Authenticator, it has one job. Until now, we did not have the backup and restore Google Authenticator option, but now we do.
There are two ways to back up and restore your accounts, and we cover both here.
Backup accounts to Google
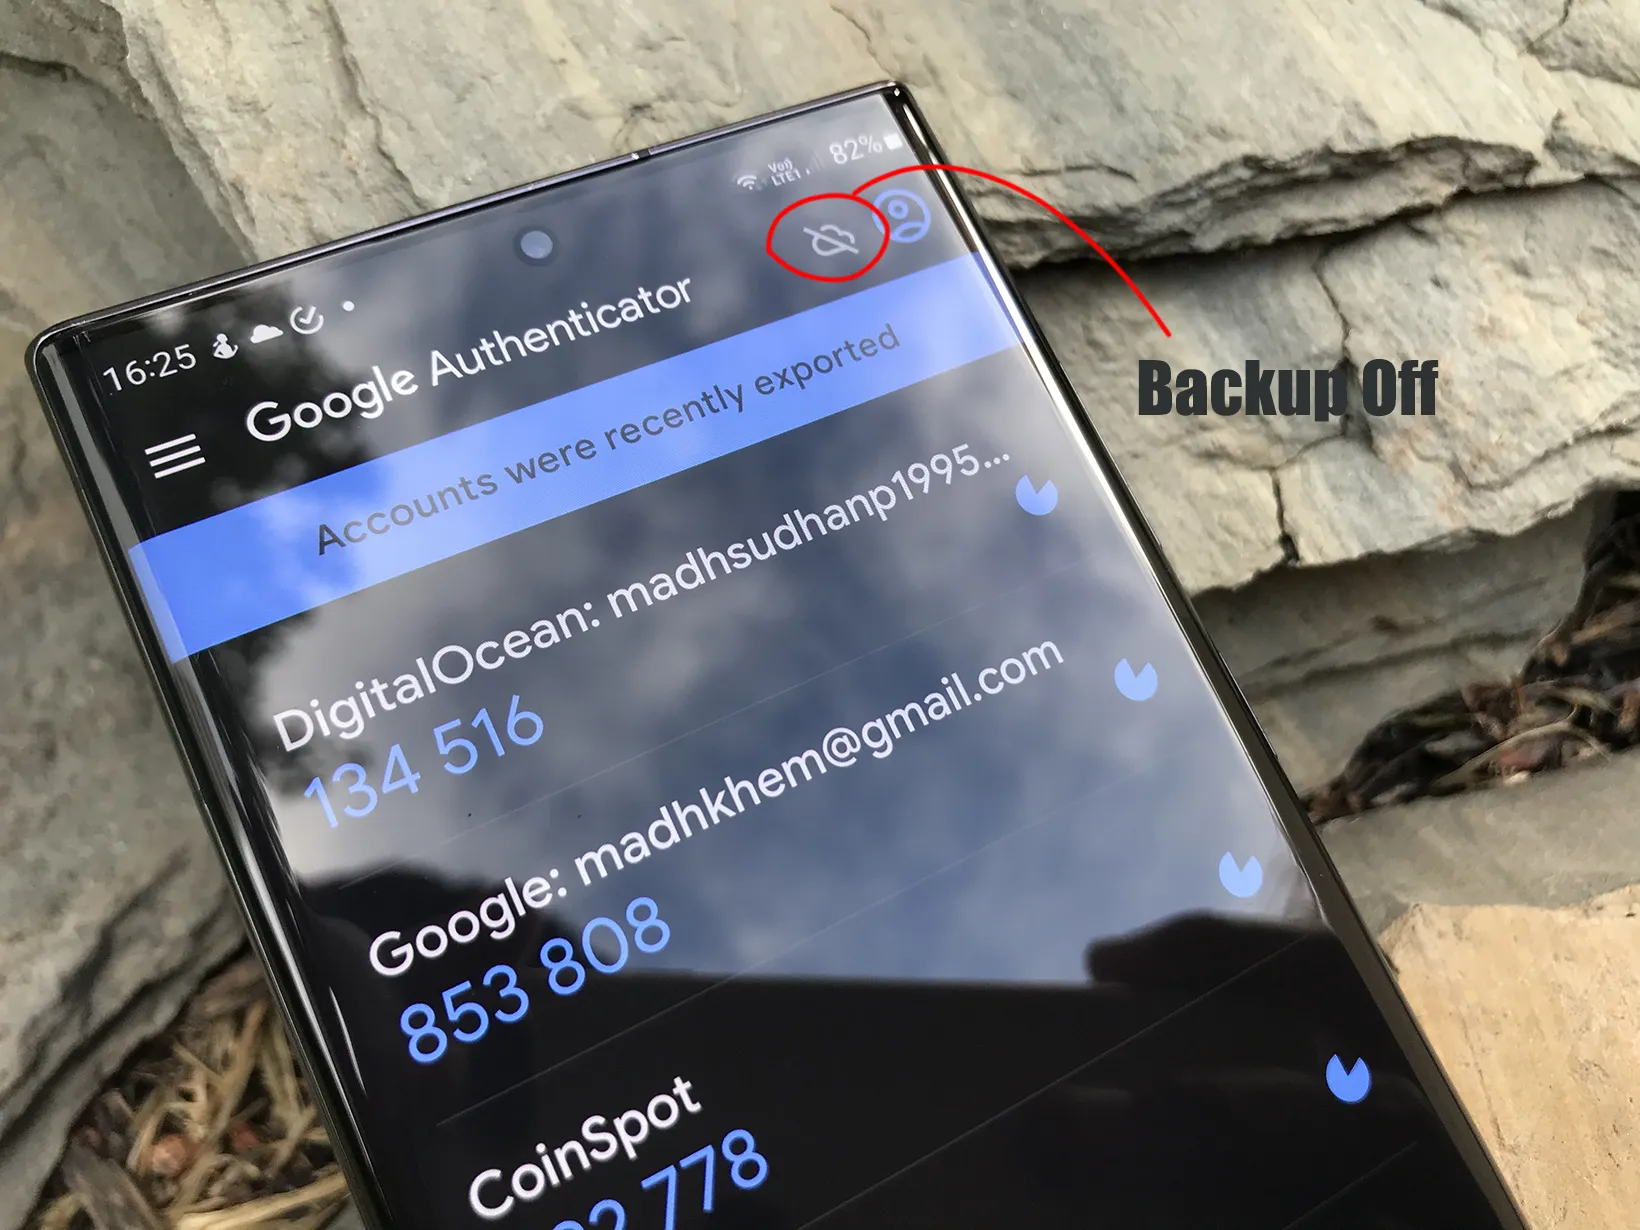
Google Authenticator Backup Off Sign
Google has just updated the Authenticator app to back up accounts online. This way, you can sign in with your account and sync codes.
First, ensure that your account is not already syncing codes. If the interface is like the above image (gray cloud icon), we are good to go.
If you see a green icon, the app is already syncing codes. Follow the steps to enable Google Authenticator cloud backup:
- Tap the Profile icon next to the Cloud icon
- Tap the account to sync (if you have multiple Google accounts)
- Click on Allow
In a few seconds, the cloud sign will turn green, indicating the success of the process.
Restore accounts from Google
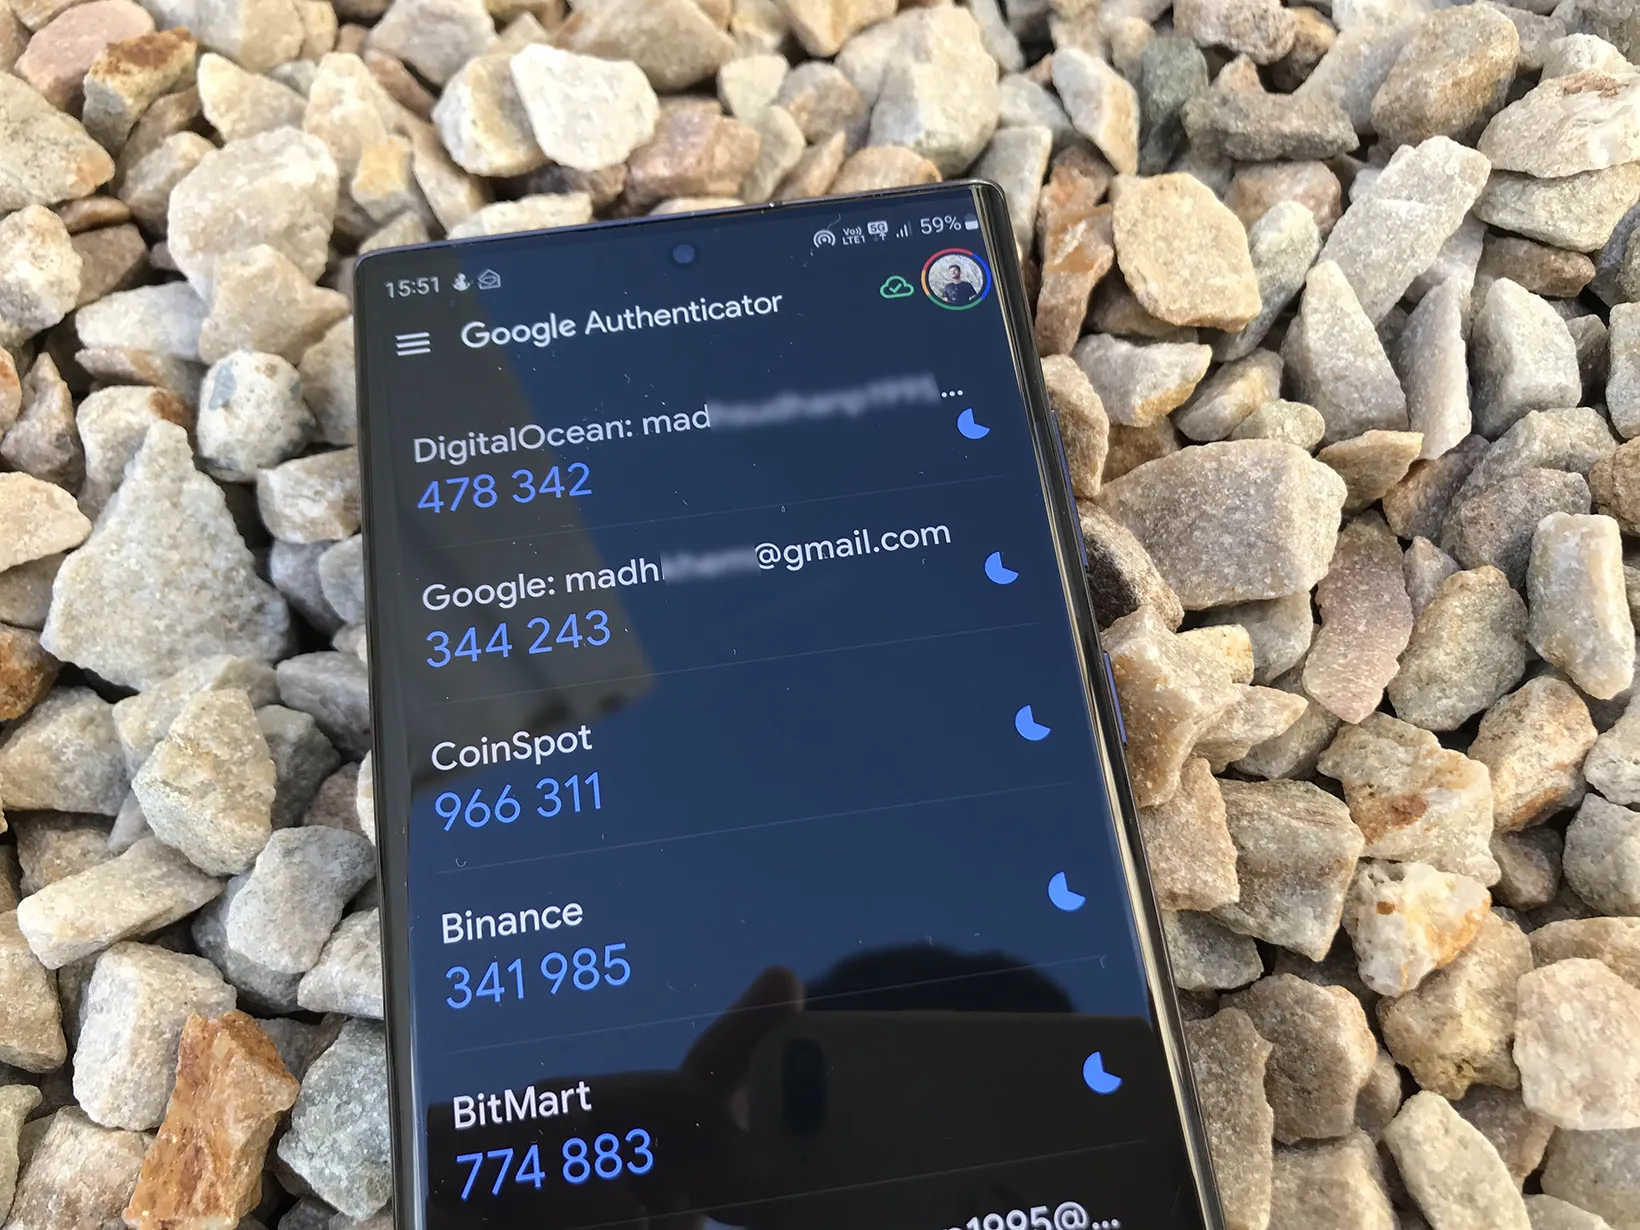
Cloud Backup Sign
Restoring synced accounts is also easy. Open the Authenticator app on your new device.
Ensure the cloud backup is not disabled from one of the synced devices.
Tap the Profile icon on the top. On the next screen, choose the Google account or sign in with the same account. The synced accounts will show up on the interface.
To remove codes from the previous device, follow the steps below.
Removing cloud backup
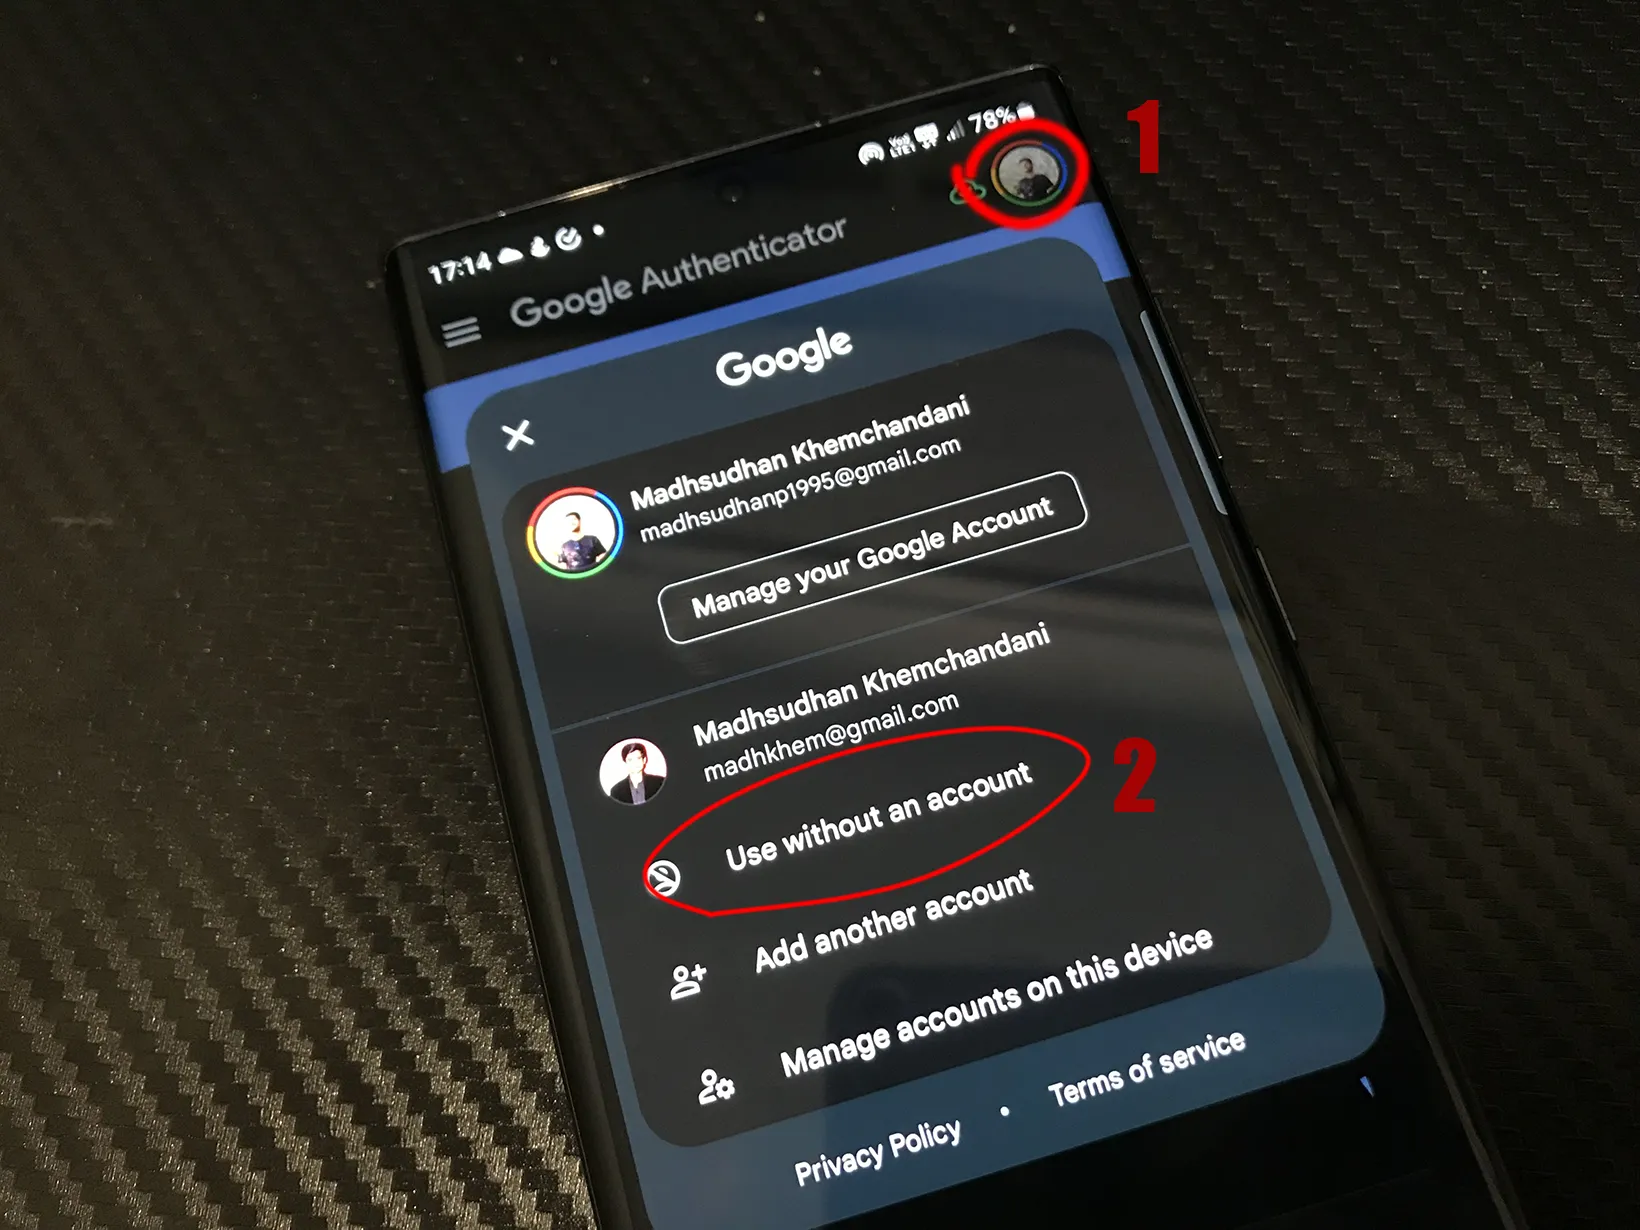
Removing Cloud Backup from Google Authenticator
You can disable the cloud backup by tapping your profile icon and “Use without an account.”
With this, all your accounts will be deleted from all other devices.
To re-enable, follow the steps in the above section. Check out Authy against Microsoft Authenticator while you are here.
Backup codes manually
If you don’t want to back up and restore Google Authenticator online, there is an offline way.
We will take a screenshot of the QR code, and every time we scan that code, we will get the same accounts back.
How to back up Google Authenticator manually:
- Open Google Authenticator
- Tap on the Menu button in the top left
- Tap Transfer accounts
- Select Export accounts
- Check the accounts to export
- Tap Next
- Take a screenshot of the displayed QR code
Save this image somewhere safe. An external hard drive is the best place, but online storage platforms also work.
Restore codes from the manual method
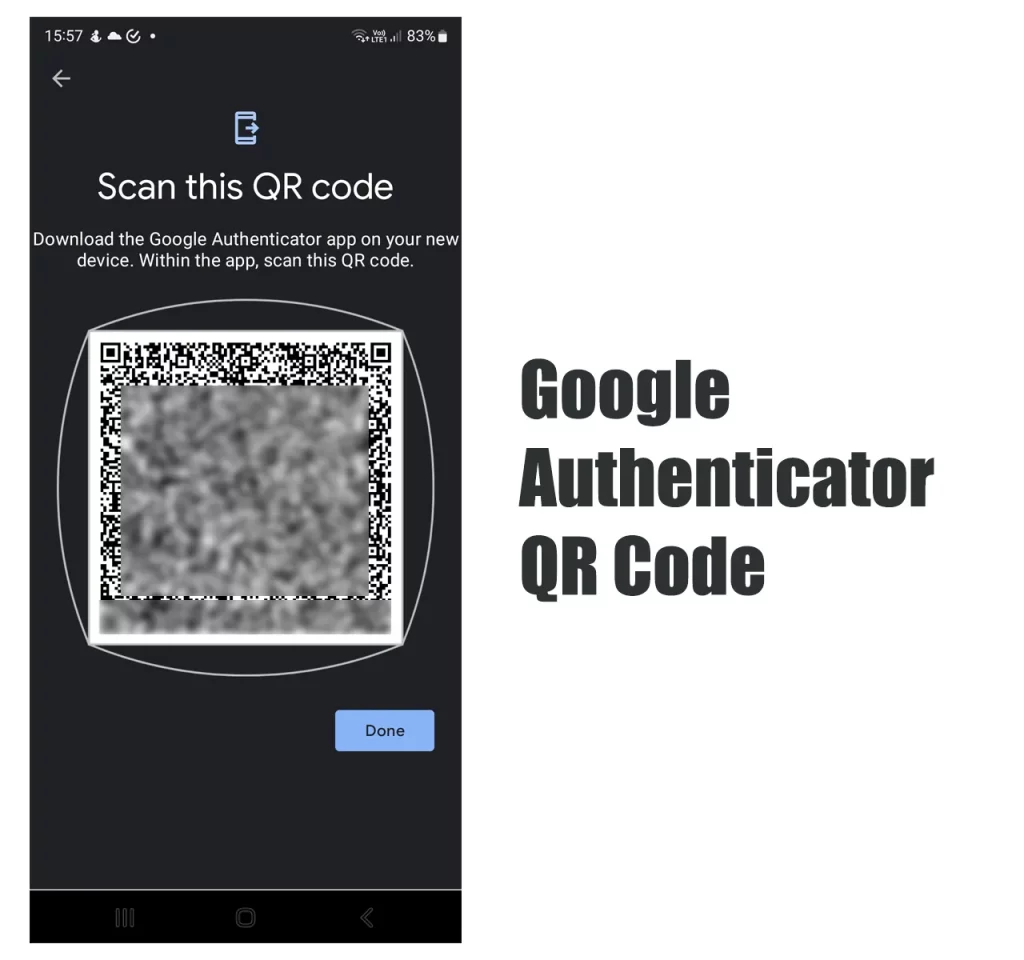
Restoring Google Authenticator Accounts
You need a separate device to restore accounts, as Google Authenticator needs to scan the QR code.
Open Google Authenticator and follow the steps:
- Click the Menu button in the top left
- Tap Transfer accounts
- Tap Import accounts
- Enable camera permission (if needed)
- Point the camera toward the QR code
The phone will vibrate, and you will see all the codes. The app on the original device will get a notification “Accounts were recently exported.”
With the manual method, you can transfer codes from one device to another without needing an account.
Summary
I still believe that Microsoft Authenticator is better because it’s feature-rich.
I remember selling my phone and realizing I did not transfer codes. I had to send emails to support, and my Dropbox account is still blocked. However, thanks to Google, we can now enable cloud backup.
My name is Madhsudhan Khemchandani. I have a bachelor’s degree in Software Engineering (Honours). I have been writing articles on apps and software for over five years. I have also made over 200 videos on YouTube. Read more about me on the About page.
How to Backup Google Authenticator or Transfer It to a New Phone

Our regular readers know that we strongly recommend applying two-step verification wherever it’s possible. In the contemporary world, where database leaks are a standing affair, two-step authentication is not an option, it is, in fact, a must. If you use two-factor verification, an intruder would need to get both the unique password you came up with, and the gadget, which produces the verification codes, to break into your account. Thus, two-factor authentication protects from brute force, keyloggers, most cases of phishing and social engineering. It also complicates man-in-the-middle and man-in-the-browser attacks.
So why two-factor verification is still unpopular? Sure, it creates an extra step to take to log in, but most users omit it not because of this extra time and effort, but because they are afraid of losing access to their credentials if something goes wrong with their authentication devices.
From all available options of one-time passwords generation or delivery (SMS, emails, hardware and software tokens) most people choose Google Authenticator or other similar applications like Authy, Protectimus Smart etc. Operating principle is pretty much the same for all the software OTP tokens — they generate authentication codes for logging into your account right on your smartphone.
It’s very convenient to use the smartphone for two-factor verification, but there are always these nagging questions: What do you do if you lose the smartphone which generates your one-time passwords? What occurs if you switch smartphones, do you lose the entire account? How do you transfer Google Authenticator to a new phone? In this article, we will answer these nagging questions and help you protect your invaluable personal data.
3 ways to backup Google Authenticator
Backup codes
Google, as well as some of the other websites where you can protect your user account with two-step authentication, provides backup codes. These are the one-use codes that allow you to login into your account if you lose access to your OTP token. After you use a backup code once it’s gone for good. Most people print out these Google Authenticator backup codes and keep them at hand.
It is imperative to understand that Google Authenticator is a multi-token, thus you can enroll many tokens for various websites using one app. Some of these websites provide backup codes, and a user can gain access to these websites if his/her smartphone is lost. But what do you do with the websites which do not support backup codes?
Another point against Google Authenticator backup codes is — they are as secure as a password written down on a paper. An intruder can easily copy them if they are in physical vicinity and use them to gain access to your account. Granted, the intruder will have to be among your peers and know the user password, but you know… things happen.
Other things that you might want to keep in mind when it comes to printed out backup codes:
- You do not have them at hand at all times
- You can lose the paper or destroy it by mistake
- Only a few services provide them
Google Authenticator backup codes have their perks, but you have to be ready for the drawbacks as well.
Saving screenshots of the secret keys
This is by far the easiest way to never lose access to your account. When you first set up your Google Authenticator simply make a screenshot of the barcode with the secret key. Keep the screenshot very secure though, if someone in your vicinity finds it they can access your data. Please, mind, if it really happens and someone steals your secret key, they will still need to know your user password, so make sure it’s not a simple combination to guess.
Programmable hardware token
Created as a more secure alternative to the authentication apps, hardware tokens Protectimus Slim NFC can be used with Google, Facebook, GitHub, Dropbox etc. These tokens are easily programmed with an application for Android with NFC support.
The token looks like a credit card and can be carried with you effortlessly. So you’ll always have an alternative source of one-time passwords on all times, for example, if your smartphone battery is out of charge or you’ve reset the phone or deleted the token accidentally.
The hardware token is far more secure than a backup code on paper or a screenshot of the key — extracting the secret key from the token is absolutely impossible. Protectimus Slim NFC allows for unlimited reprogramming, so every time you change a token on a service you can simply reprogram it and stay protected.
The main drawback here is that one token allows for one secret key only.
How to transfer Google Authenticator to a new phone
Move Authenticator to a different phone
With Google, it is pretty straightforward to transfer the authenticator and all the secret keys within it to another smartphone. All you’ve got to do is go to the two-step verification page and click the “Change phone” button. Then either scan the QR or barcode, or put in the secret key on the other gadget manually. That’s it.
This works only with the Google account, the other accounts where you use Google Authenticator for two-step authentication might not support this option. You will transfer only the Google token this way. So you might want to try the next two options instead.
Disable & Re-enable Two-Factor Authentication
Disabling two-step verification is pretty easy if you still have your old smartphone. It’s usually required to enter the OTP from the currently used token to disable two-factor authentication on any account. To disable 2FA for a while, just click the “Turn Off 2-Step Verification”, “Delete the token”, “Disable 2-step verification” or similar button, depending on the service you use. You’ll find it at the two-step verification page in security settings.
Then add the authenticator application to your new gadget and follow the usual steps to set up Google Authenticator on the new phone.
Manually Extract Your Credentials [Root Only]
Note: There are many ways to manually transfer Google Authenticator if you have an Android smartphone with root access to it. We do not recommend using them though. Getting root access can significantly damage the security of your apps and make the device prone to getting viruses and errors.
This is a more time and effort consuming way to transfer Google Authenticator key to the other smartphone. It requires you to have root access to the smartphones.
To extract the secret keys manually you need to give adb root access, this is easily done with an app like [root] adbd Insecure if you’ve got stock ROM. And in case you happen to have custom ROM you might already have the necessary root access adb, so no additional apps are needed.
Set adb onto insecure mode with the application or directly, connect the smartphone to your PC or laptop and copy the Google Authenticator databases to the computer using the commands.
This is the pathname:
adb pull /data/data/com.google.android.apps.authenticator2/databases/databases
After the file is copied you can open it and see the keys using these sqlite editor commands:
select * from accounts;
Now you have your secret keys and can add them to your new device.
Conclusions
Two-phase authentication is a reliable and reasonable way to shield your invaluable personal data. Whether you use a hardware token or apps like Google Authenticator or Protectimus Smart, you now know how to stay safe even if you change devices or lose your smartphone.
We showed you easy ways like Google backup codes and making screenshots of the secret keys. And we showed you more secure option like the Protectimus Slim NFC hardware token.
So now you do not have any excuses not to protect your info better. All that is left to do is come up with proper user passwords which are not the name of your cat!
Как сделать резервную копию аутентификатора
Рассказываем о нескольких способах, которыми можно сделать резервную копию приложения-аутентификатора.

22 сентября 2021
Если вы пользуетесь приложением-аутентификатором, то на случай потери (поломки, кражи и так далее) телефона разумно заранее создать резервную копию. Это можно сделать несколькими способами — выбор зависит от ваших личных предпочтений, а также от того, каким именно приложением-аутентификатором вы собираетесь пользоваться. Перечислим все доступные варианты.
Вручную сохранить в надежном месте секретные ключи или QR-коды
Одноразовые коды в приложении-аутентификаторе создаются на основе секретного ключа. Его генерирует сервис, когда вы включаете аутентификацию с помощью приложения. Этот ключ представляет собой случайное сочетание 16 символов, и он же закодирован в QR-коде, который сервис предлагает вам отсканировать.
В принципе, секретный ключ можно даже выучить наизусть, но проще всего будет сохранить его в каком-нибудь надежном месте. Например, для этого подойдут защищенные заметки в менеджере паролей. Альтернативный вариант представления того же секретного ключа, QR-код, можно сохранить в виде изображения и также поместить в защищенное хранилище Kaspersky Password Manager, но уже в виде картинки.
Если вам когда-нибудь понадобится восстановить аутентификатор, вы просто отсканируете приложением QR-код или введете вручную 16 символов секретного ключа.
Использовать облачную синхронизацию приложения-аутентифкатора
Большинство популярных приложений-аутентификаторов — за исключением Google Authenticator — предлагает возможность хранения секретных ключей в облаке и автоматической синхронизации аутентификаторов на разных устройствах. Однако в этом методе есть минус: в приложении-аутентификаторе придется завести учетную запись, а для этого обычно требуется поделиться с его создателями номером телефона или адресом электронной почты.
В случае Microsoft Authenticator можно воспользоваться учетной записью Microsoft, если она у вас есть (если нет — придется завести). Кроме того, следует иметь в виду один нюанс: Microsoft Authenticator для iOS сохраняет резервную копию в iCloud, а версия для Android — в какое-то другое не уточняемое создателями облако. Поэтому бэкапы получаются несовместимы: если вы пользовались айфоном, но решили перейти на Android (или наоборот), то восстановить бэкап Microsoft Authenticator не получится. Придется заново заводить токены для всех аккаунтов в новой версии приложения.
Экспортировать уже заведенные в аутентификаторе токены
По какой-то совершенно непонятной причине функция экспорта и импорта уже заведенных в приложение токенов есть только в одном аутентификаторе из всех, которые мы проверили, — это Google Authenticator.
Вероятно, разработчики других приложений считают, что их облачная синхронизация эту функцию успешно заменяет. Отчасти это так. Но облако никак не поможет тем, кто уже пользуется Google Authenticator и хотел бы попробовать альтернативу, быстренько перенеся уже имеющиеся токены в новое приложение. Почему-то создатели альтернативных аутентификаторов совершенно не пытаются упростить жизнь таким «перебежчикам».
Так или иначе, в Google Authenticator сохранять токены очень легко и удобно: достаточно нажать на три точки в верхней части экрана, выбрать «Экспорт аккаунтов» и отметить нужные учетные записи. После этого на экране появится огромный QR-код, в котором содержатся все выбранные токены сразу. Остается просто сделать скриншот и сохранить картинку в защищенном хранилище
менеджера паролей.
Установить приложение-аутентификатор сразу на несколько устройств
Одноразовые коды в аутентификаторе создаются на основе секретного ключа и текущего времени. Поэтому ничто не мешает иметь одновременно несколько копий работающих приложений-аутентификаторов, которые синхронно друг с другом генерируют одинаковые коды.
В таком случае, даже если вы лишитесь аутентификатора на одном смартфоне, у вас останется запасной, полностью готовый к действию. Это могут быть даже разные приложения, — правда, в этом случае их будет не так легко и удобно синхронизировать друг с другом.
- Установить аутентификатор на несколько устройств сразу можно разными способами:
- Одновременно сканировать QR-коды (или вводить секретные ключи) двумя смартфонами.
- Отсканировать ранее сохраненные коды вторым устройством.
- Воспользоваться облачной синхронизацией в большинстве приложений (кроме Google Authenticator).
- Экспортировать токены из Google Authenticator на одном смартфоне и импортировать на втором.
Какой бы вариант вы ни выбрали, советуем не тянуть и создать резервную копию аутентификатора как можно скорее. Иначе можно в самый неподходящий момент оказаться в ситуации, когда доступ к аутентификатору утрачен, бэкапа нет, а в аккаунт нужно срочно попасть. Впрочем, даже в этом случае не все потеряно: о том, как восстановить аутентификатор, не имея резервной копии, читайте в нашем посте.