Как перенести сайт с Фигмы на Тильду
Да, теперь дизайнерам не нужно никаких дополнительных расширений, платных сервисов, кодов, модификаций. Макет, в два клика можем перенести из графического редактора Figma в Тильду. В конце статьи, будет видео, как я переношу этим способом дизайн на Тильду. А в этой статье, все по пунктам распишу, какие есть нюансы и правила для переноса.
И так приступаем. Эта самая подробная инструкция по переносу. Даже подробней, чем официальная от Тильды.
В конце самый сок – это все я делаю в формате скринкаста
Автоперенос из Фигмы в Тильда
- Ширина фрейма в Фигме должна быть 1200 px
2. Каждый смысловой блок или экран, разбивать на отдельные фреймы
3. Кнопки в Фигме нужно объединить в группу слоев
4. Чтобы импортировать группу картинкой, нужно группе дать название image или svg
Какие нюансы есть при импорте дизайна
- Насколько я понял, формы пока переносить нельзя
- Группы из Фигмы переносятся в Тильду, только иерархия такая: если внутри одной группы, есть еще группы, то все перенесется в первую
- Адаптацию макета под остальные разрешения придется делать самому
- Если есть эффект на элементе в Figma, но этого эффекта нет в самом конструкторе, то эффект импортируется картинкой
- Формат инфографики в SVG у меня, почему то импортируется странно, возможно потому что они у меня были компонентами
- После переноса дизайна в Тильду, изображения нужно залить на сервер Tilda, платформа об этом сообщит вверху, где выбираем разрешения экрана. Это можно сделать одним кликом.
- Если не залить фото на сервер Тильды, то они хранятся 30 дней.
- Анимацию проекта импортировать в редактор нельзя. Придется ее потом настраивать в ручную
- При импорте дизайна, элементы в Tilda позиционируются по левому верхнему краю (Left, Top)
- Если хотите при переносе верстки в Тильду, чтобы картинка была как фоновая, то ее надо загрузить во Frame. Выбрать Фрэйм, в Fill где выбор цвета, с Solid переключаем на Image. Если картинку загрузить как картинку, то она перенесется в Тильду обычной картинкой и вам нужно будет в настройках переключать позиционирование и размер, если нужно будет, чтобы она растягивалась на все разрешение экрана
Тут все просто, главное придерживаться шагов, описанных в этой инструкции
Как перенести сайт из Фигмы в Тильду
Получаем в Фигме API Access токен
- Переходим на Главную в Figma (нажимаем домик)
- В правом верхнем углу, нажимаем на иконку своего профиля
- Нажимаем на Setting
- Во вкладке Account листаем вниз до «Personal access tokens»
- Там в окошке «Create a new personal access token:» пишем любое название нашей интеграции
- Жмем Enter и ждем одну-две секунды, пока сформирует редактор нам ключ
Интегрируем с платформой Tilda
- Копируем его и идем в Тильду
- Создаем Zero-блок
- Удаляем весь контент и нажимаем на три точки справа вверху
- Import
- В поле API Token вставляем наш скопированный из Фигмы токен
- Не закрываем это окно, так как нам нужно теперь вставить ссылку на файл в графическом редакторе Figma
Переносим дизайн
- Открываем фигму в браузере
- Находим наш проект с дизайном и подготовленным для импорта макетом
- Выбираем наш фрейм, который мы хотим экспортировать
- Жмем на ссылку в браузере
- Вставляем ее в окно Layout URL, где мы вставляли API ключ
- Жмем кнопку Import и ждем
- Готово
Вот так нас обрадовали разработчики Тильды. То, что у нас отнимало кучу времени, сейчас можно сделать автоматически двумя щелчками мыши.
На этой странице, для сравнения, есть видео, где я переношу в ручную дизайн из фигмы. И только десктопная версия у меня по времени в переносе заняло порядка 60 минут.
С автопереносом от Тильды это займет не более 30 минут.
Так что друзья, Тильда, очень активно развивается, у них пополняется штат разработки
А вот само видео. Там я подробными разъяснениями, я показываю шаг за шагом автоперенос из Фигмы в Тильду.
Figma Token Engine: Quick Start

I write this Quick Start to show how to install, configure and use the FTE. It will make it easier for you to include FTE on your workflow and help you boost your productivity and connectivity with tokens.
We’ll follow these steps:
- Create a Figma file with the tokens we’ll read from (both as Figma Styles and Tokens Studio).
- Create a React App which will be using the tokens.
- Install and configure the FTE.
- Run the FTE to import the tokens in both formats.
What is a Figma Token Engine (FTE) (and why?)
But before we get our hands dirty, a bit of context. FTE is a tool we developed to create an automatic communication channel between design decisions (represented as design tokens) and code. The main objective of the tool is to simplify the standarization and update of these decisions throughout all the digital products sharing a Design System.
On a high level, the FTE fetches design tokens from Figma through the Figma API (either represented as Figma Styles or as tokens on Jan Six’s Tokens Studio plugin) and transforms them to usable code (css, js, JSON, etc.) using Amazon’s StyleDictionary.
Tokens and app setup
Figma File (Styles)
To make things easier, let’s start with a template that already has a lot of the data and structure we’ll use. The Figmagic template is a good starting point, which actually was a big inspiration for the starting stages of FTE:
This file already has a lot of Figma Styles defined on it, that we’ll be reading as our tokens.
In order for the styles to be available on the Figma API, we need to publish them as a library:
- On the left side bar, click on Assets
- Click on the Book icon just bellow the Tabs
- On the modal that pops-up, click on Publish
4. And then select the styles and click on Publish Styles
Token File (Tokens Studio)
We’ll also configure tokens on Token Studio, using the same styles values:
- Install the plugin on Figma and open it. Click on “New empty file”.
- On the left side of the plugin window, click on Styles > Import Styles
- On the popup, make sure all the checkbox are selected and click “Import”
- And finally on “Create all” on the next popup
React app
Next, we’ll setup the “client” of the FTE, which will be using the tokens. Again, to mantain this setup simple I’ll use a fresh create-react-app as the “client” of FTE:
We’re going to style this page using tokens imported by the FTE.
How to install and configure
Now that we have all our pre requisites in order, we can start using the Figma Token Engine.
FTE is published as an npm script package and can be easily added as a package dev dependency on any npm project.
The FTE offers an option to create examples of all necessary configuration files:
This creates a .tokens.config.json file:
On this .env file, we add our Figma Access Token (get one here) and the URL for our token file (you can get it from the Share button). Resulting in something like this:
With this we are ready to use the FTE.
Running the FTE
Figma Styles
To set the FTE to read the Figma Styles, update the field tokenFormat on .tokens.config.json to “FigmaStyles”:
And we simply run the engine by calling:
This will fetch the styles from the Figma file, transform them to the specified formats (the platforms on the config file):
Each of these files have the styles from the figma file as tokens on different languages and formats. For example, the scss contains:
The names of the variables are created from the names of the styles in Figma.
Reading Tokens Studio
To read this tokens just change the field tokenFormat on .tokens.config.json to “TokensStudio”:
And run the engine again:
Because we imported the tokens from the styles, these will be the same tokens, but now managed from Tokens Studio. You can add border and dimension tokens to see how those are exported!
Using the tokens in the App
As we can see, the tokens got generated inside our src/ directory, and are ready to use on our React page.
We can go to App.css and import the generated css file and use its variables across our page:
With this setup, we can update the color styles on Figma, republish them, run FTE again and our app will be updated automatically:
If we are reading the tokens from Tokens Studio, we can also update the tokens live, rerun the engine and we’ll see those changes propagated to the code.
The next video showcases a more involved tokenized component using the a lil-bit more complex “example” tokens that Tokens Studio provides:
Creating tokens
In Tokens Studio for Figma, you can create reusable and semantic tokens which you can then reference in your design process.
Creating a new token via the UI is a simple process. As an example, create a new token in the Colors type by clicking on the + icon. In the modal that appears, give your token a name, for example “colors.blue”, with a value of #0000FF, and click on create to create your first token!

Editing tokens #
To change the value of an existing token, right click the token you wish to edit and select Edit Token . You can also change the name of the token. Doing so will then display a modal asking whether or not you would like to remap all your tokens using colors.blue to colors.blue.500. You can then select the type of remapping method: selection, page or document.

Duplicating tokens #
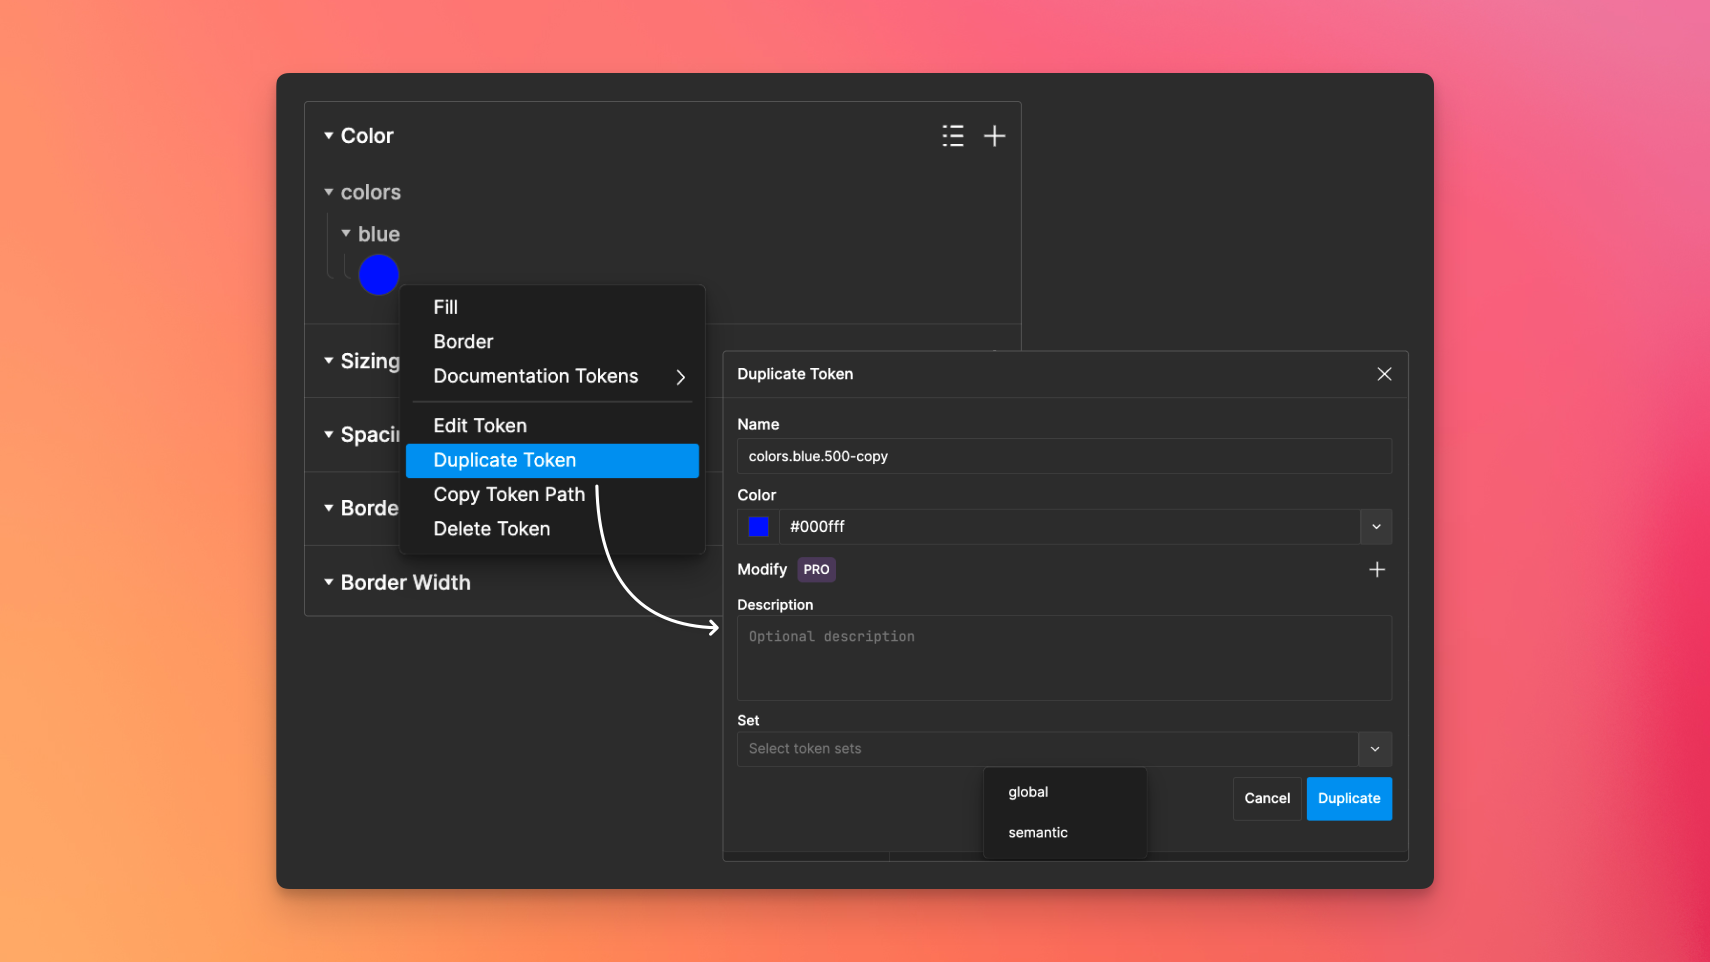
To duplicate a token, right click the token you wish to duplicate and select Duplicate Token . In addition to being able to duplicate a token, you can also select the set in which you want the token to be duplicated into.
Token groups #
As having a lot of tokens can become quite messy, you can use dot-notation in the token names to create nesting. For instance, you could have a token named "colors.button.background.primary”. This nesting approach helps keep your tokens structured and avoids clutter.
You can also remove token groups by right-clicking them and selecting Delete which will remove all tokens under that group.
КАК ПОЛУЧИТЬ API ТОКЕН В ФИГМЕ
Для получения API-токена в Figma необходимо создать новое приложение в настройках вашего аккаунта на сайте Figma. Для этого перейдите в панель настроек и выберите «Create a new app». Затем укажите настройки приложения и нажмите кнопку «Create».
После создания приложения вы получите уникальный API-токен, который необходимо использовать при работе с API Figma. Чтобы получить доступ к API, добавьте этот токен в заголовок каждого запроса, отправляемого к API.
Пожалуйста, обратите внимание, что API-токен может быть использован только для доступа к информации, которую вы согласились предоставлять вашему приложению при его создании. Это означает, что если вы хотите получить доступ к новой информации, вам нужно создать новое приложение и получить новый API-токен.
Также не забывайте о безопасности API-токена. Никогда не делитесь своим токеном публично или с другими пользователями. Если вы считаете, что ваш токен был скомпрометирован, немедленно отзовите доступ к нему и создайте новый токен в настройках вашего аккаунта.
Надеюсь, эта информация была полезна для вас. Если у вас возникли дополнительные вопросы, не стесняйтесь связаться с службой поддержки Figma.

Импорт макета из figma в tilda — Tilda Zero Block
How To Make A Responsive Coffee Shop Website Design Using HTML — CSS — JavaScript — From Scratch